

Exploring the Urban Landscape
Into Chicago Workshop Recap

If you’ve been following along here, you probably know I just returned from leading a photography workshop in downtown Chicago. I chose “urban landscapes” as the theme, because frankly that’s more aligned with my personal style. A lot of urban photography is in the “street” category, which is something I really don’t do well. Play to your strengths, right? So I approached Chicago with my clients in terms of a landscape shoot, albeit in a very different setting. Over the course of five days, we covered a lot of territory, photographed the wonderful architecture, and ate some amazing food. My job was to put my clients in position to succeed, and to provide them with creative inspiration along the way, by finding subjects, suggesting techniques, and offering tips on composition.
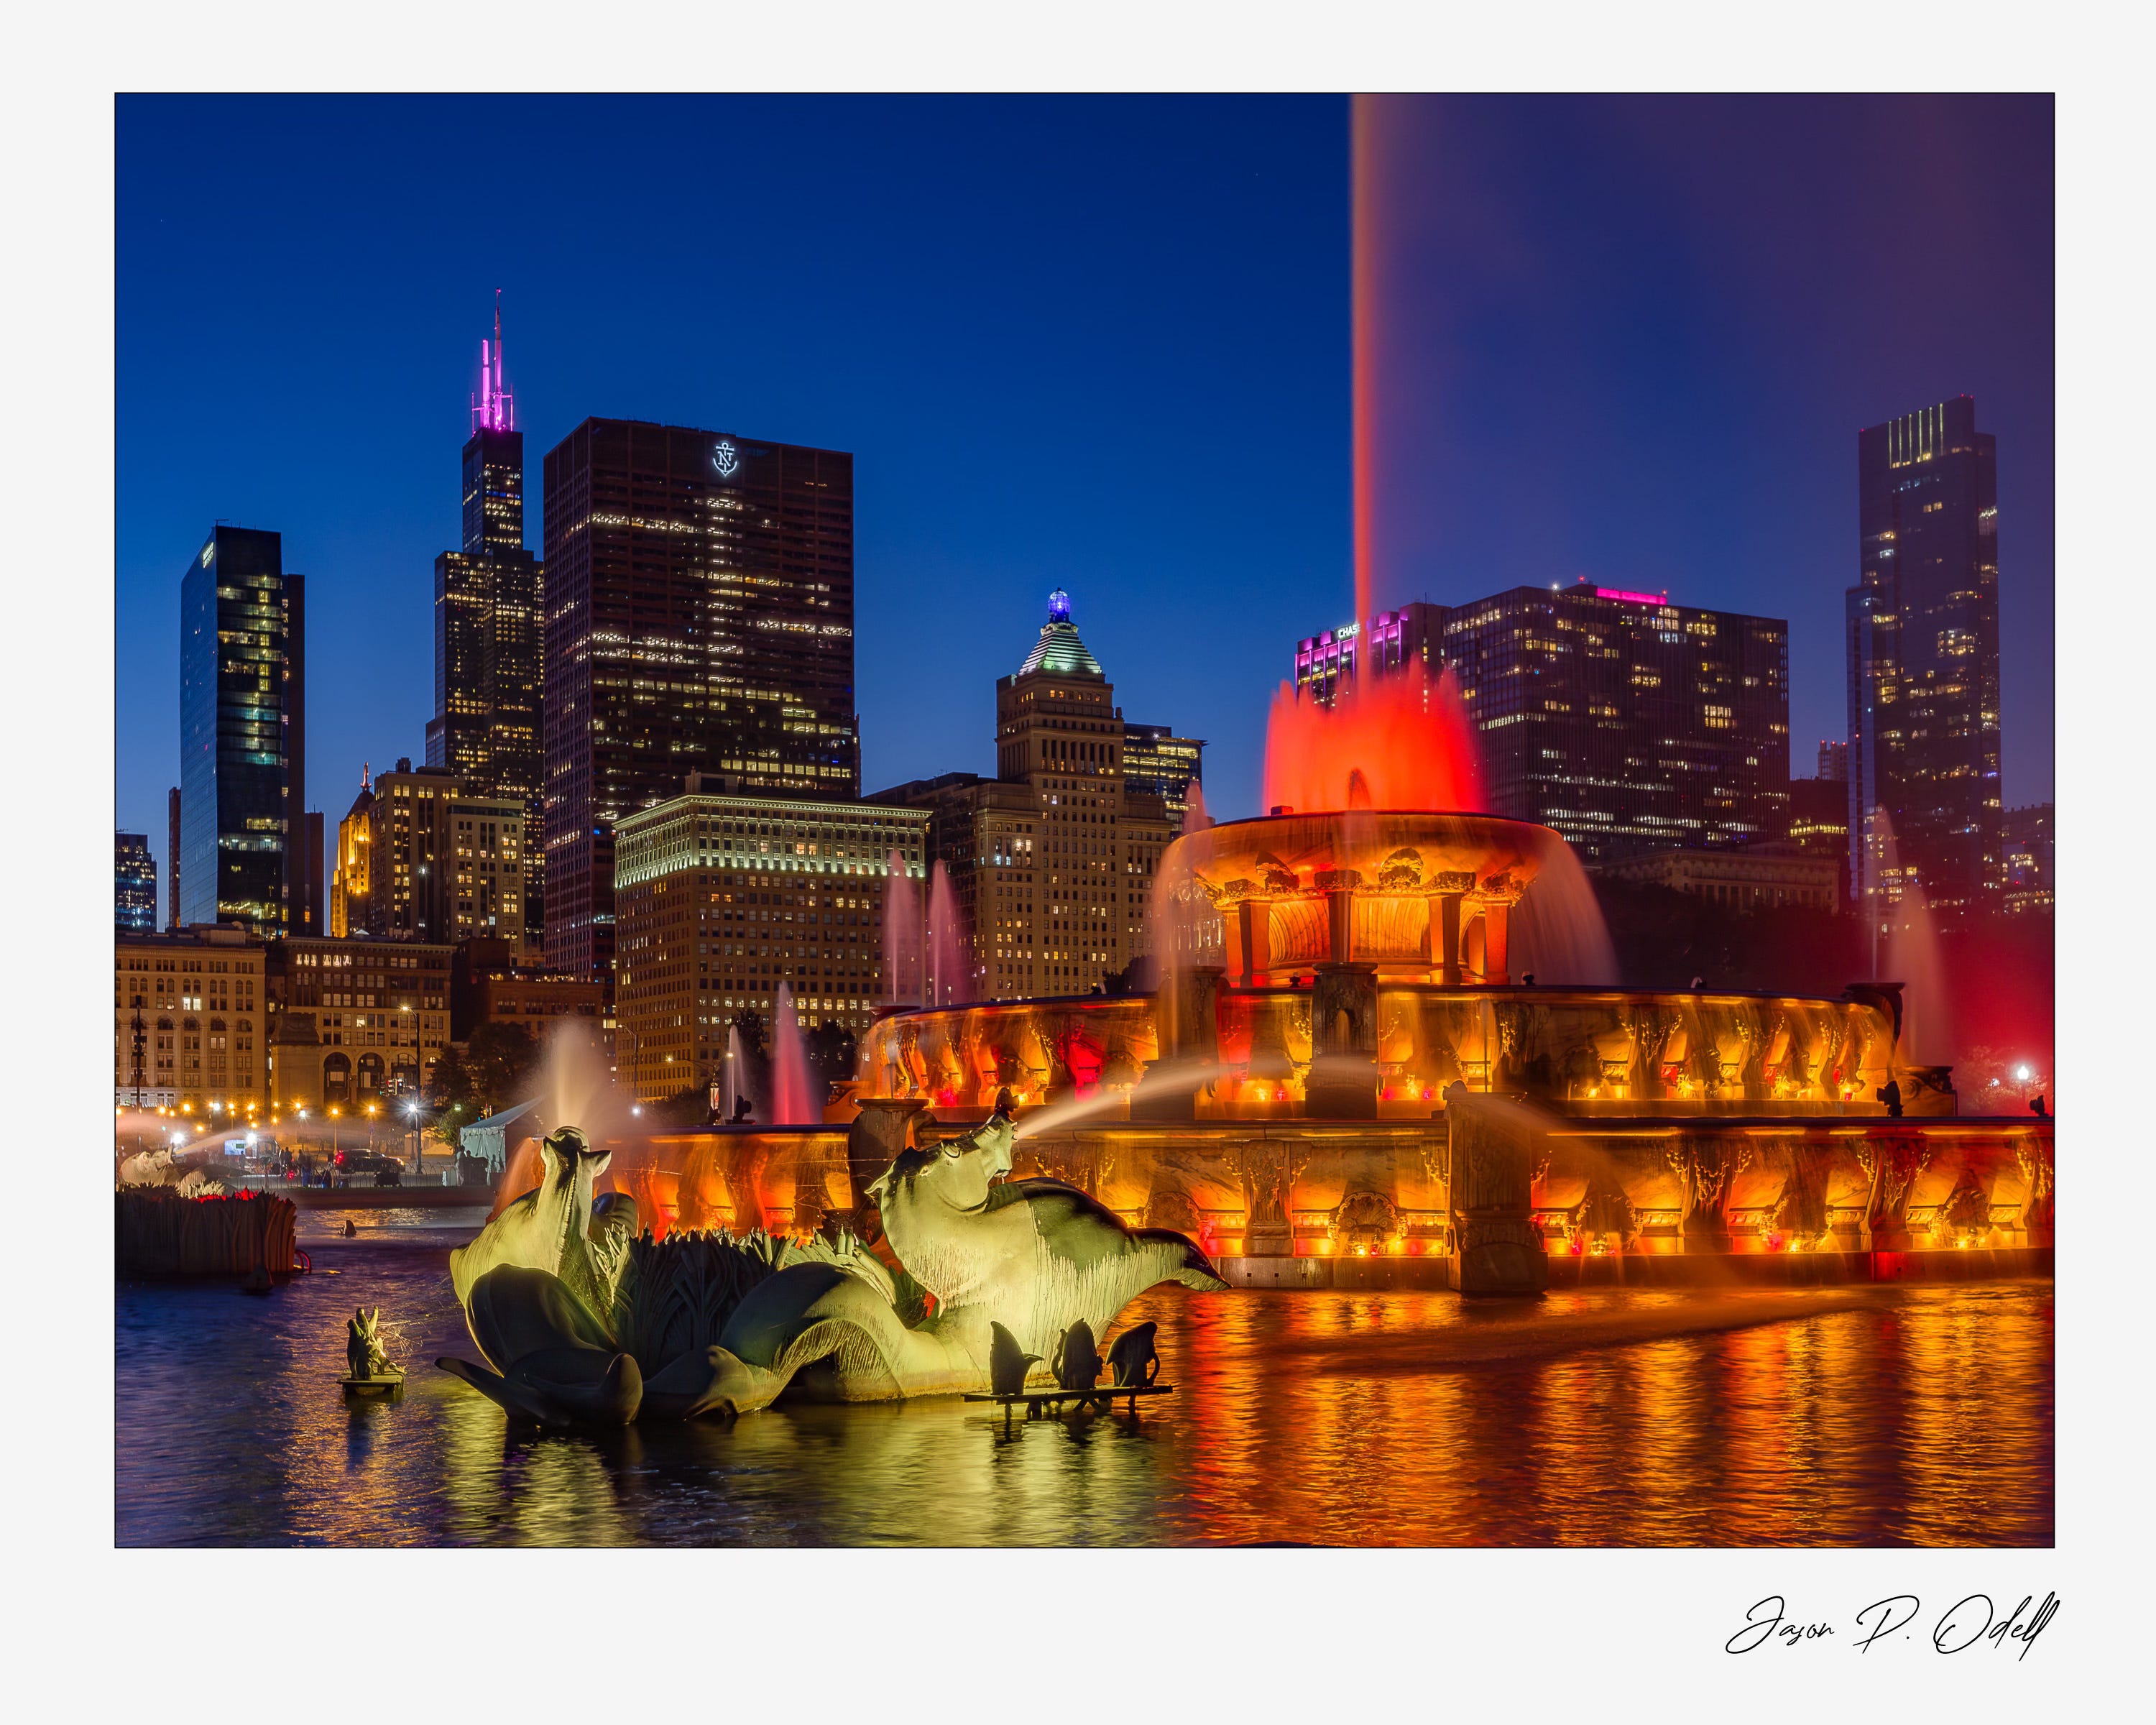
We started out by going over to the iconic Buckingham Fountain in the early evening, with the intent of photographing it during “blue hour.” The blue hour is that in-between time after sunset but before it gets truly dark, and the sky becomes a wonderful dark blue color.
I love how you can see the skyline behind the fountain, but I quickly discovered that the wide shots just weren’t working, especially when the main spout was erupting. I went with a longer focal length here, and I think it worked better because the skyline is much more prominent as a background element:
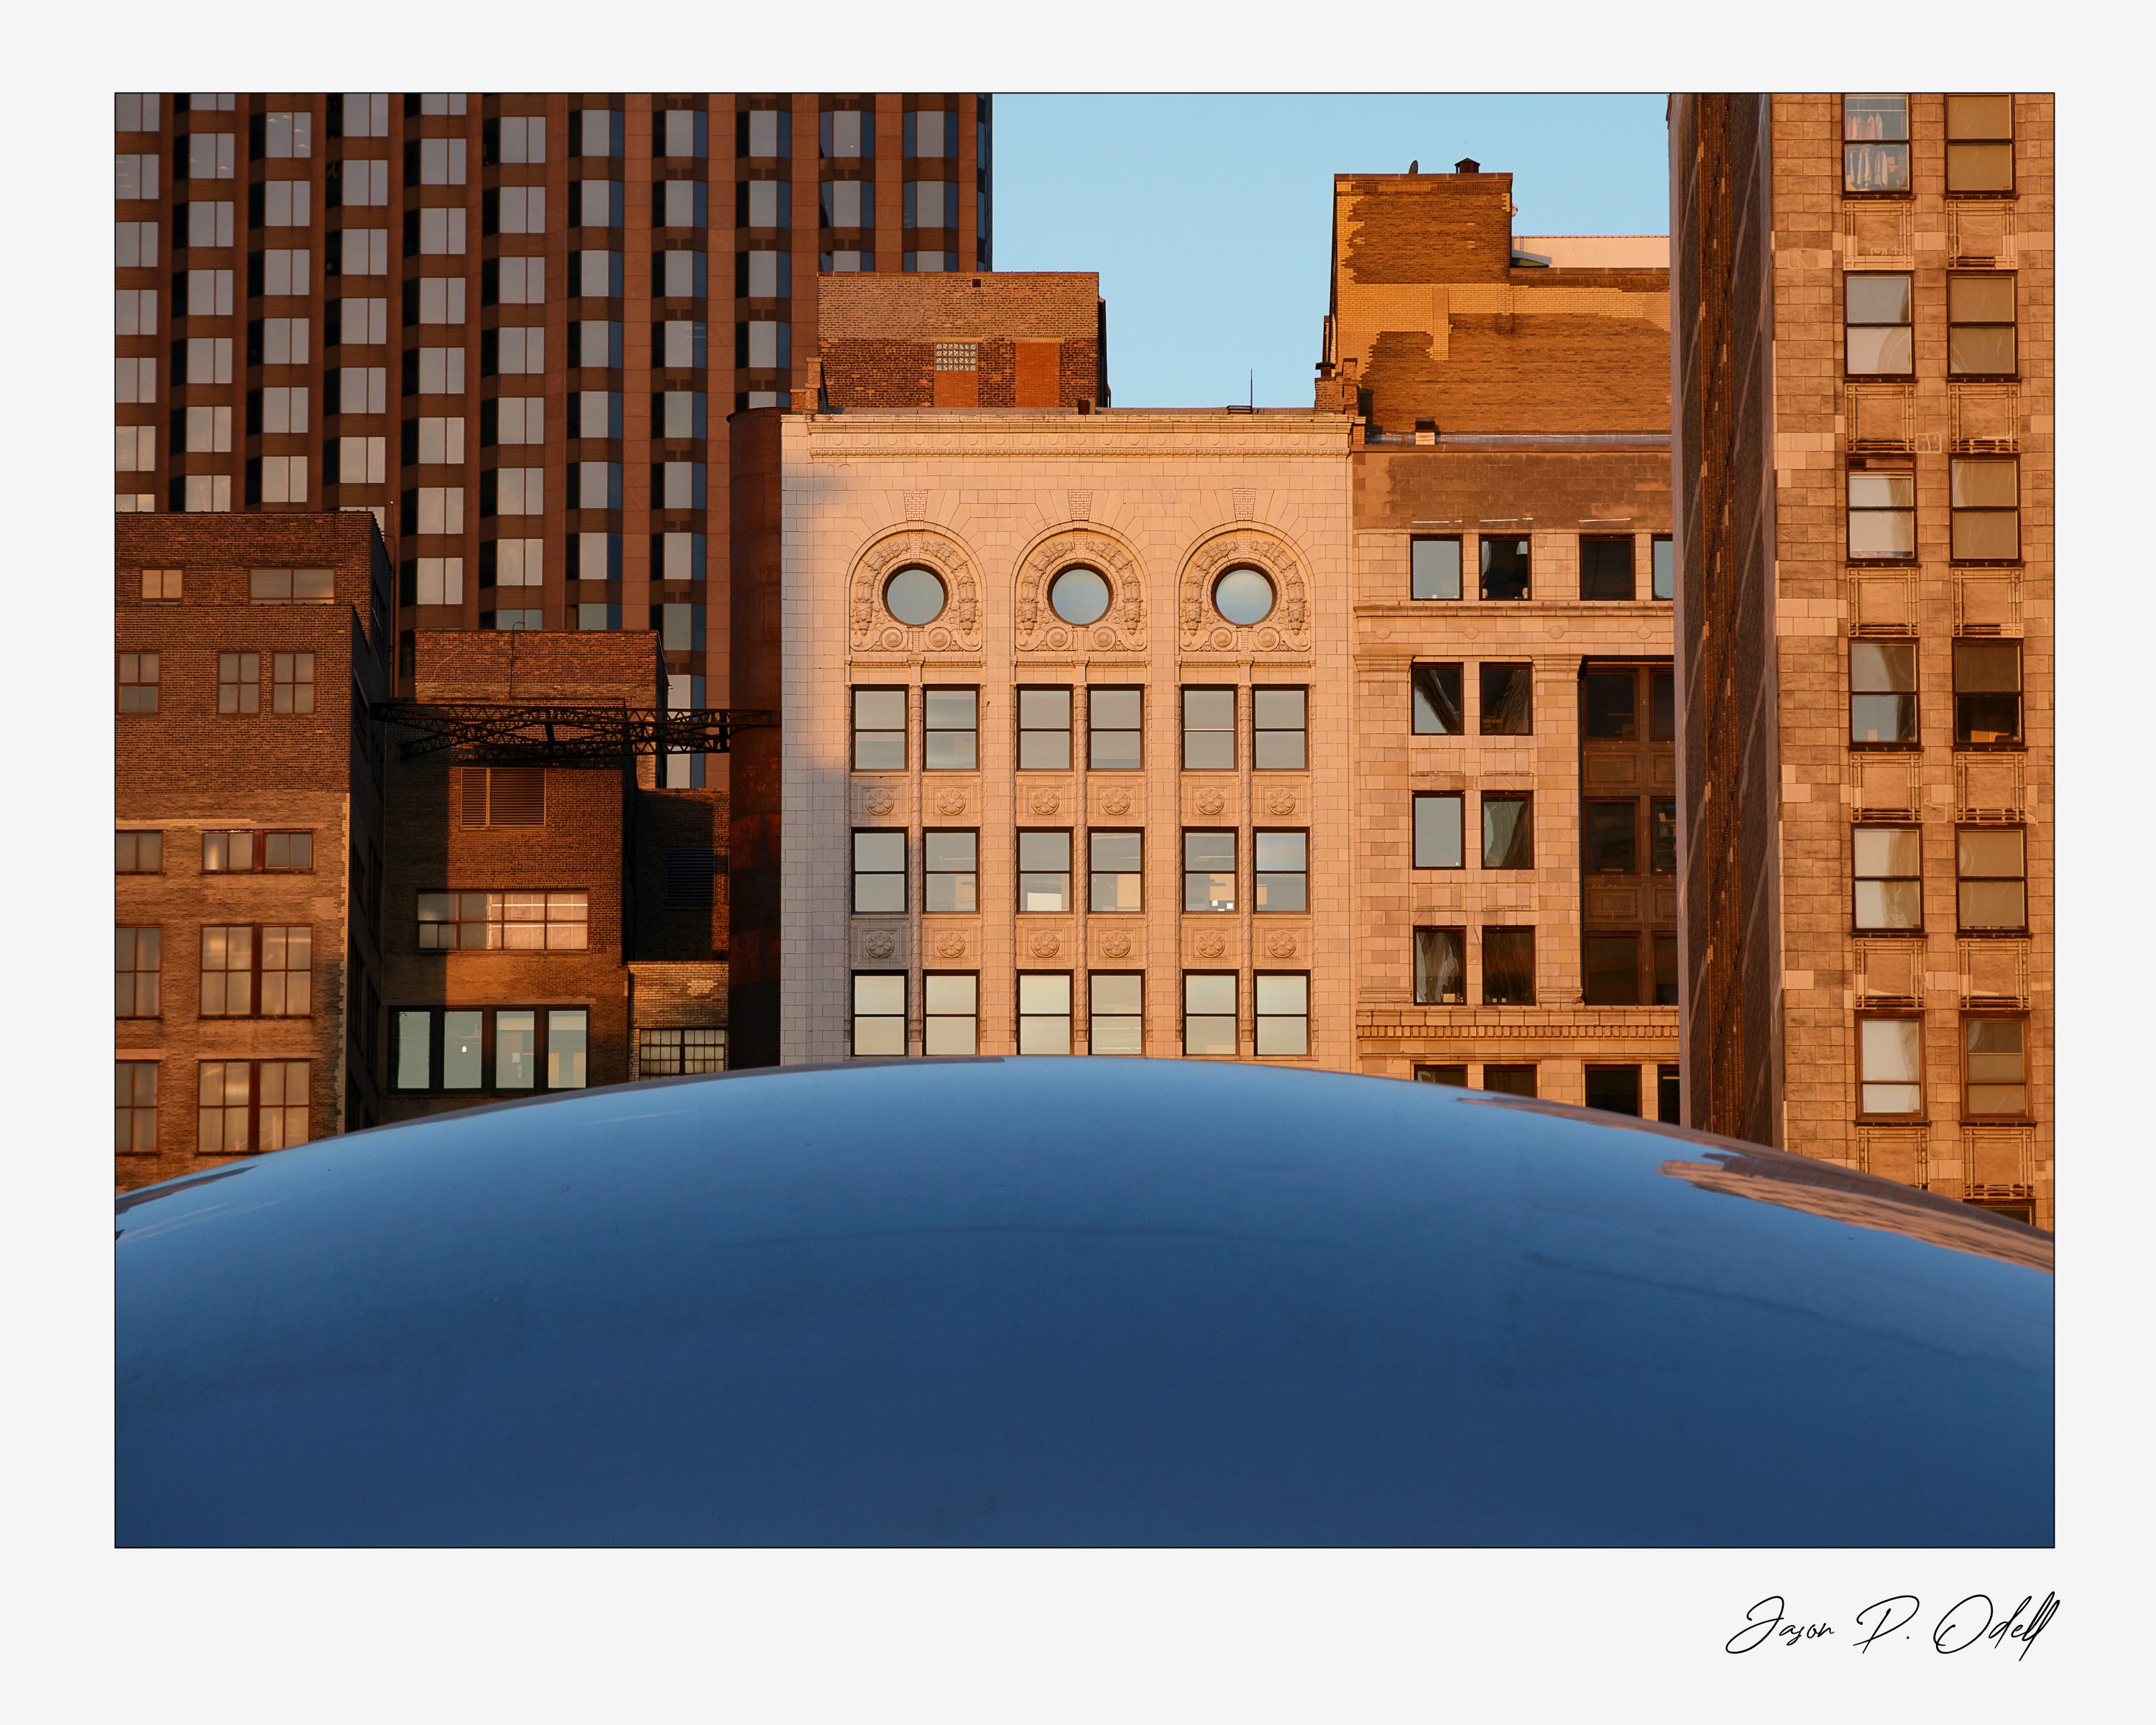
Next up, another Chicago icon: Cloud Gate. “The Bean,” as it’s referred to, is always surrounded by swarms of people trying to get selfies in front of it, but not so much at 6:30am. We got our shots and only had to deal with one “influencer” there who was kind enough to move out of the way while we were shooting. Of course, there’s only so many ways to shoot an iconic subject, so after the traditional shots, we looked for other compositions that would include the sculpture but not necessarily feature it as the primary subject:
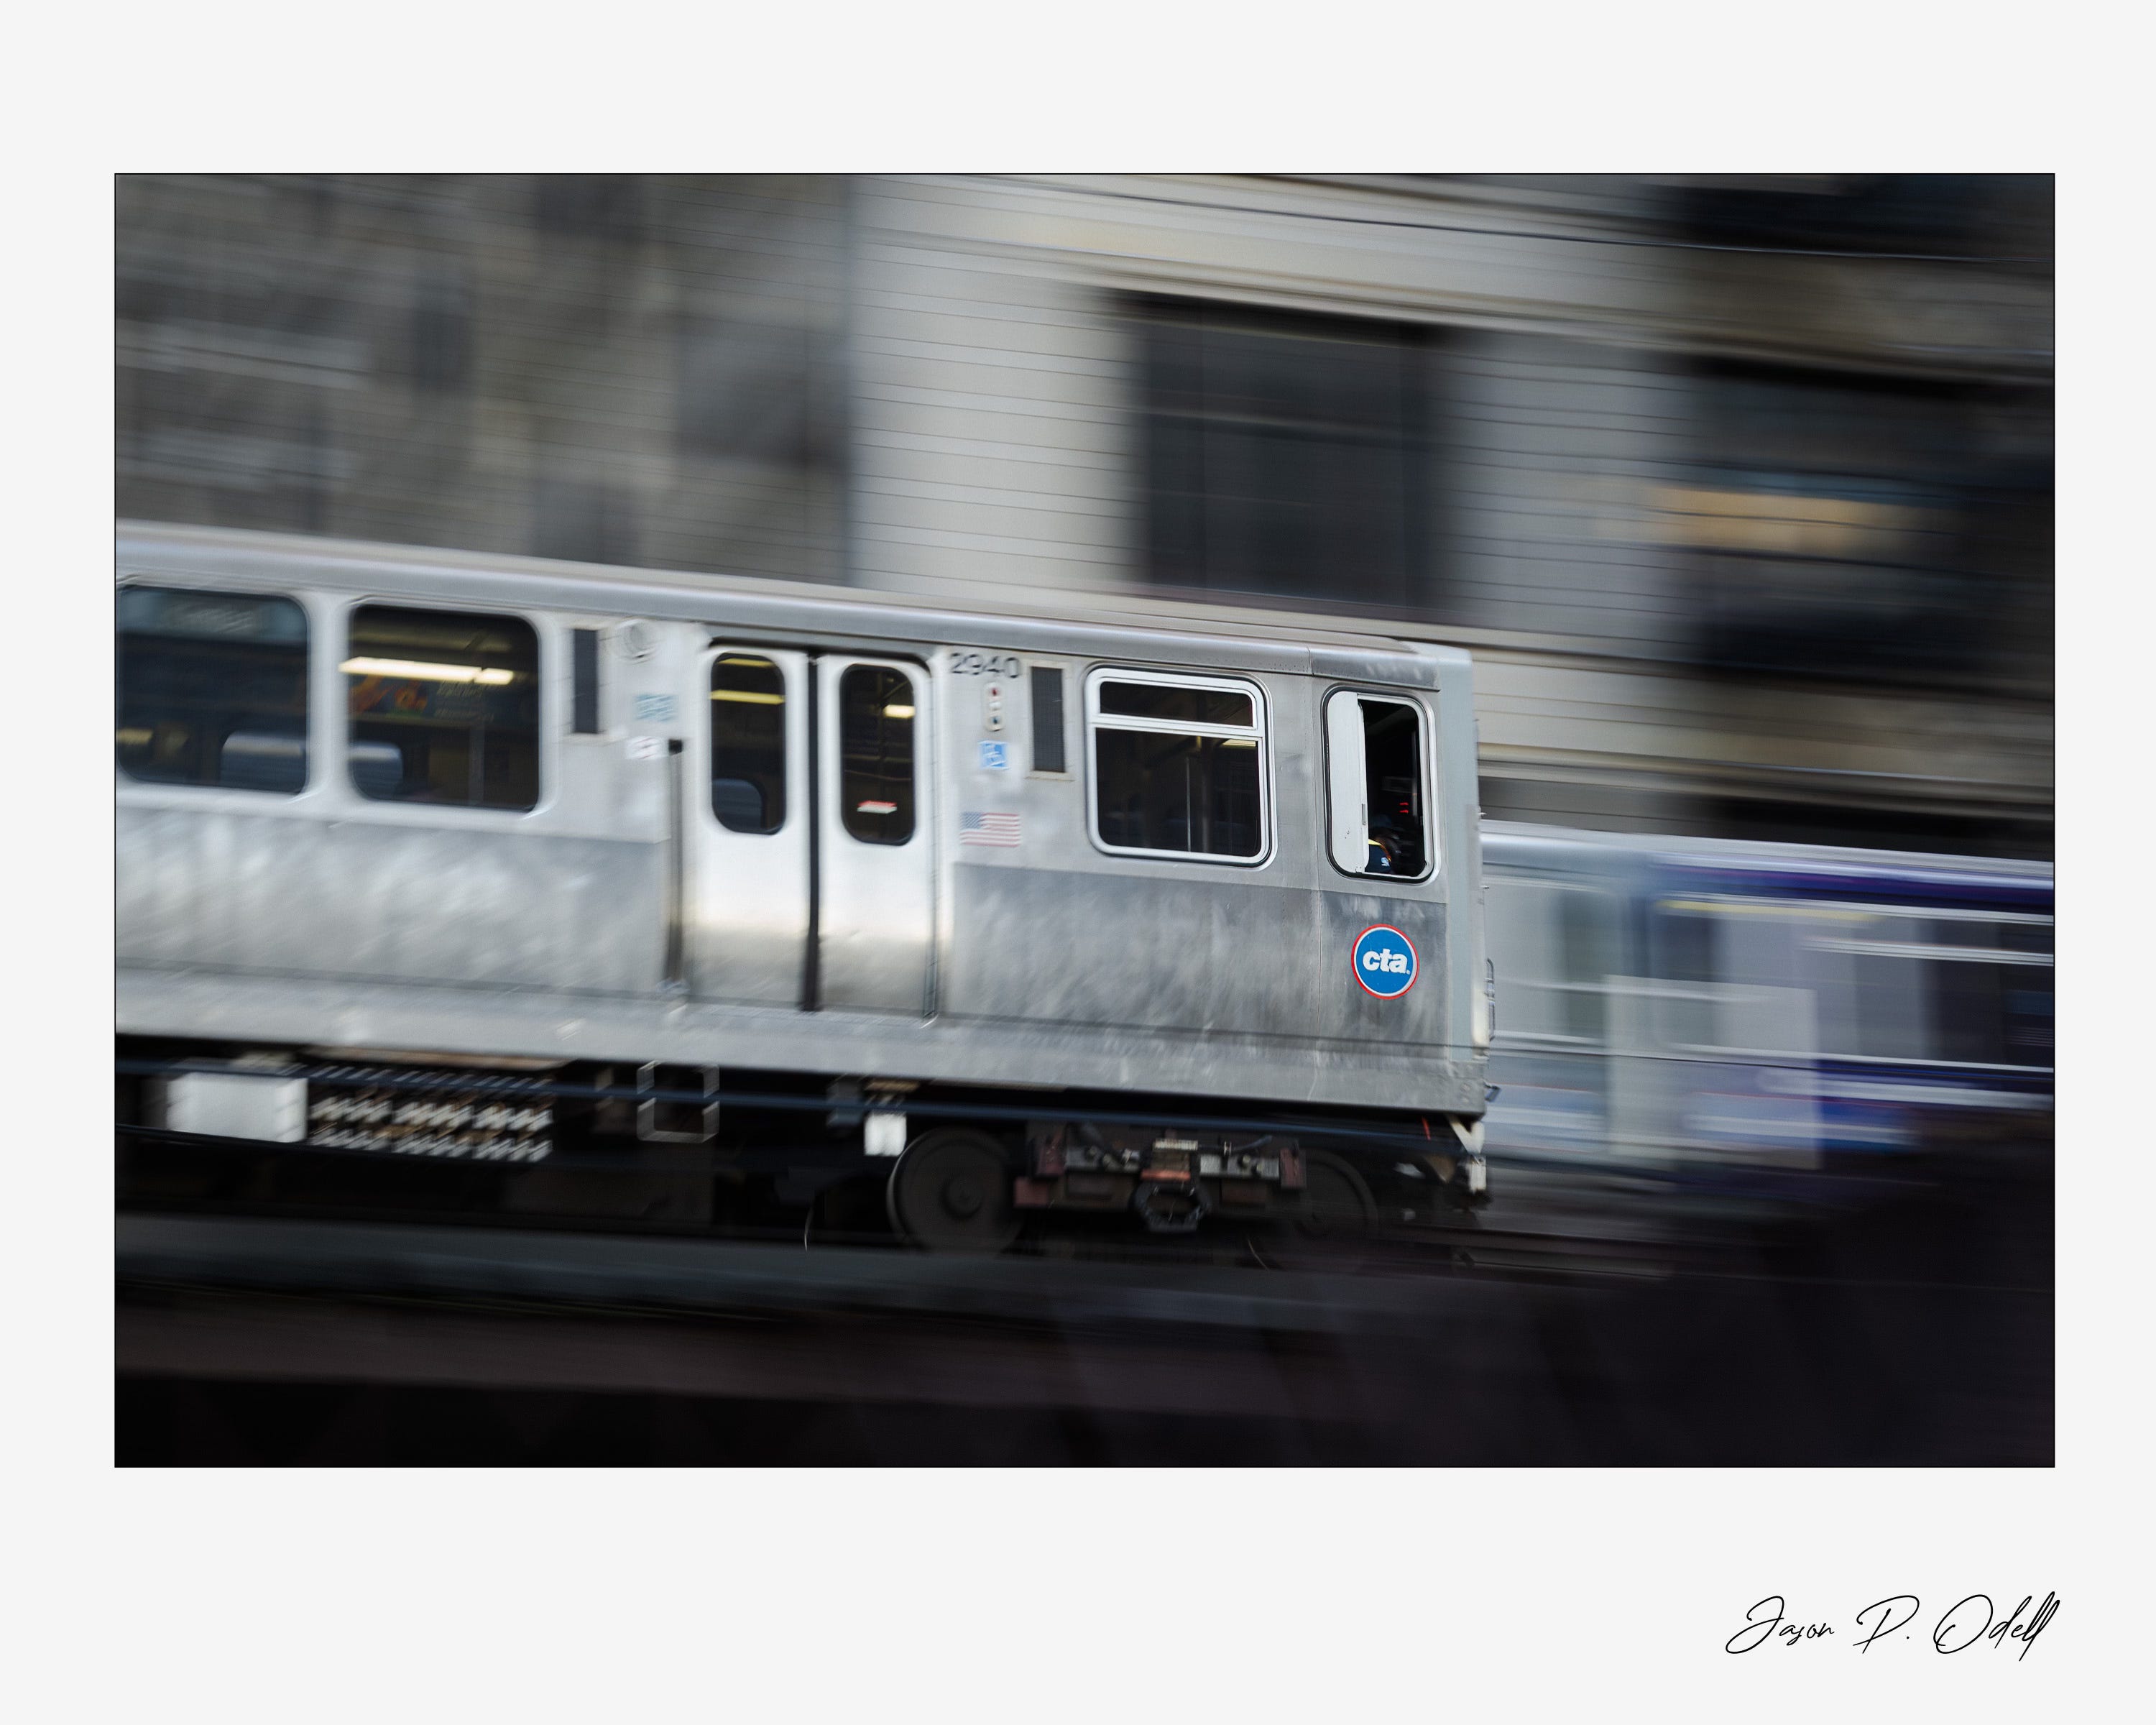
Another iconic Chicago element? The “L" trains. Much of the Chicago subway is built on elevated tracks, and the trains go above your head when you’re walking along Wabash Avenue. I thought it would be fun to slow things down and try for a motion blur with panning. It takes some practice to try to keep your subject reasonably sharp while panning the camera, but it’s not too hard.
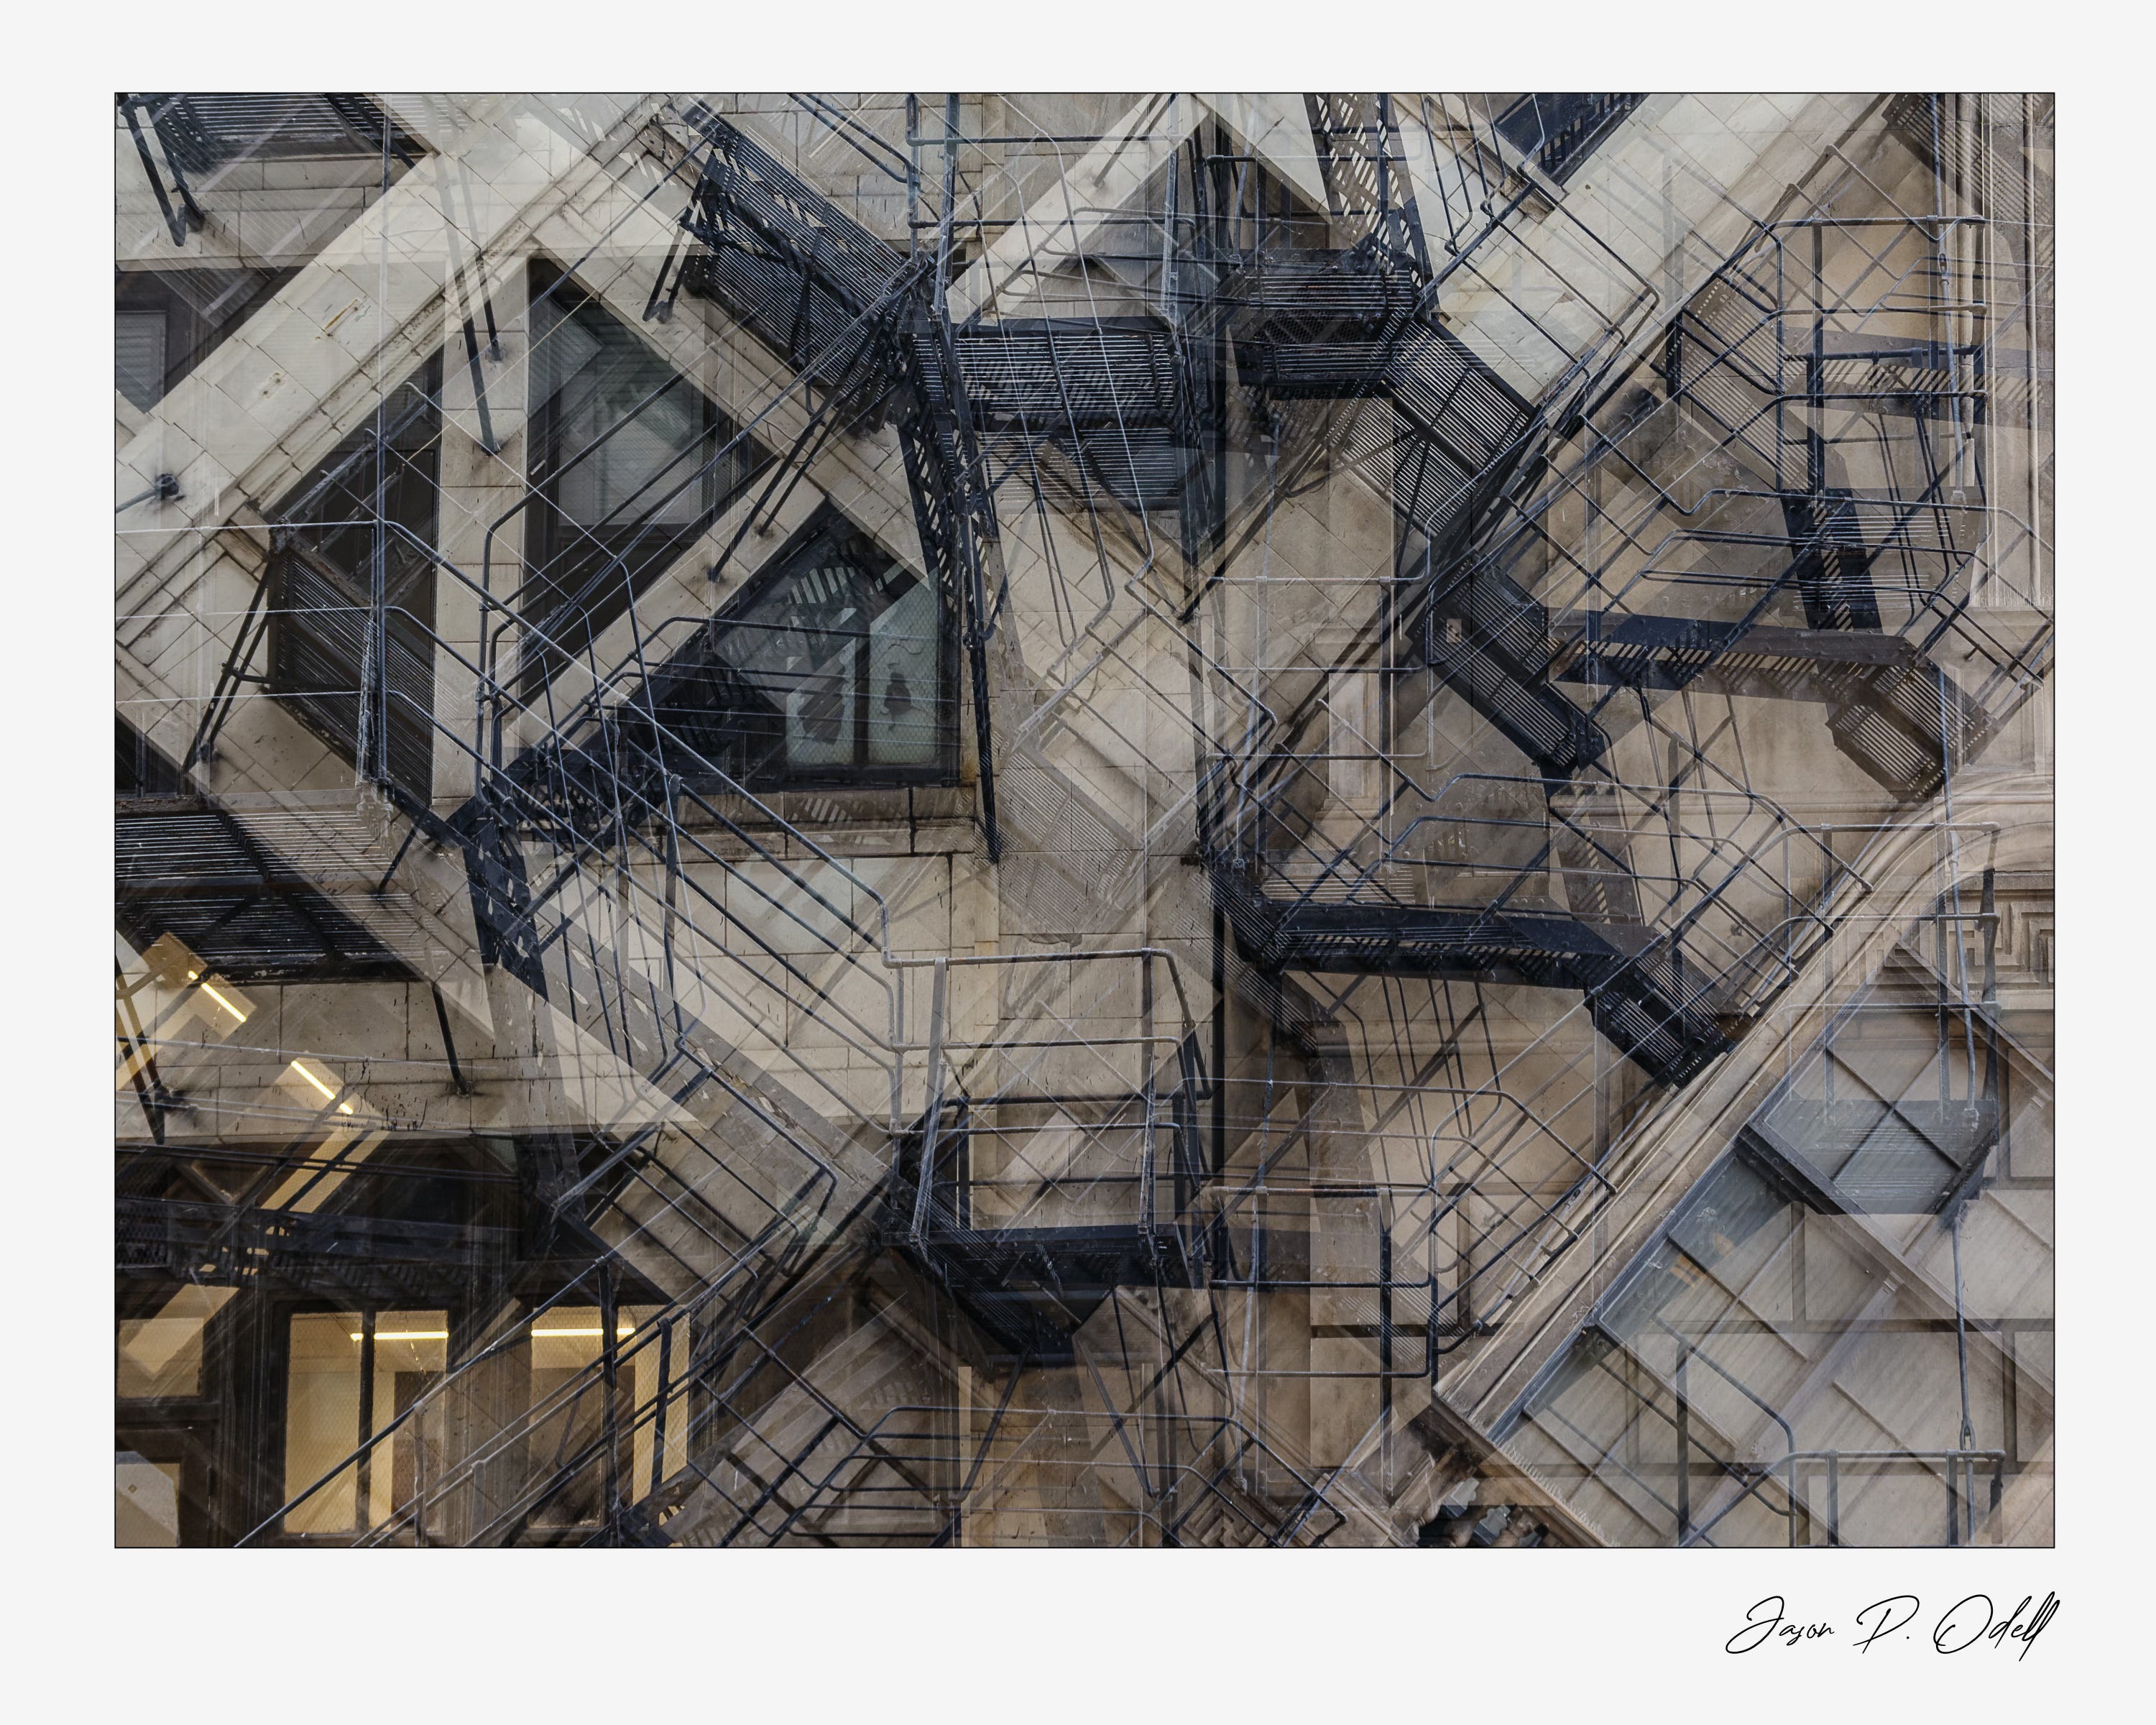
I love looking up at the buildings when I’m in a city, and Chicago has some of the best. To try something a little different, I went with a double-exposure of these fire escapes to create a more surreal shot. If you have a mirrorless camera that can capture multiple exposures, many times you’ll see the first shot in the EVF as you compose the second shot, which is a really cool feature because it allows you to line up the double-exposure while you’re taking it!
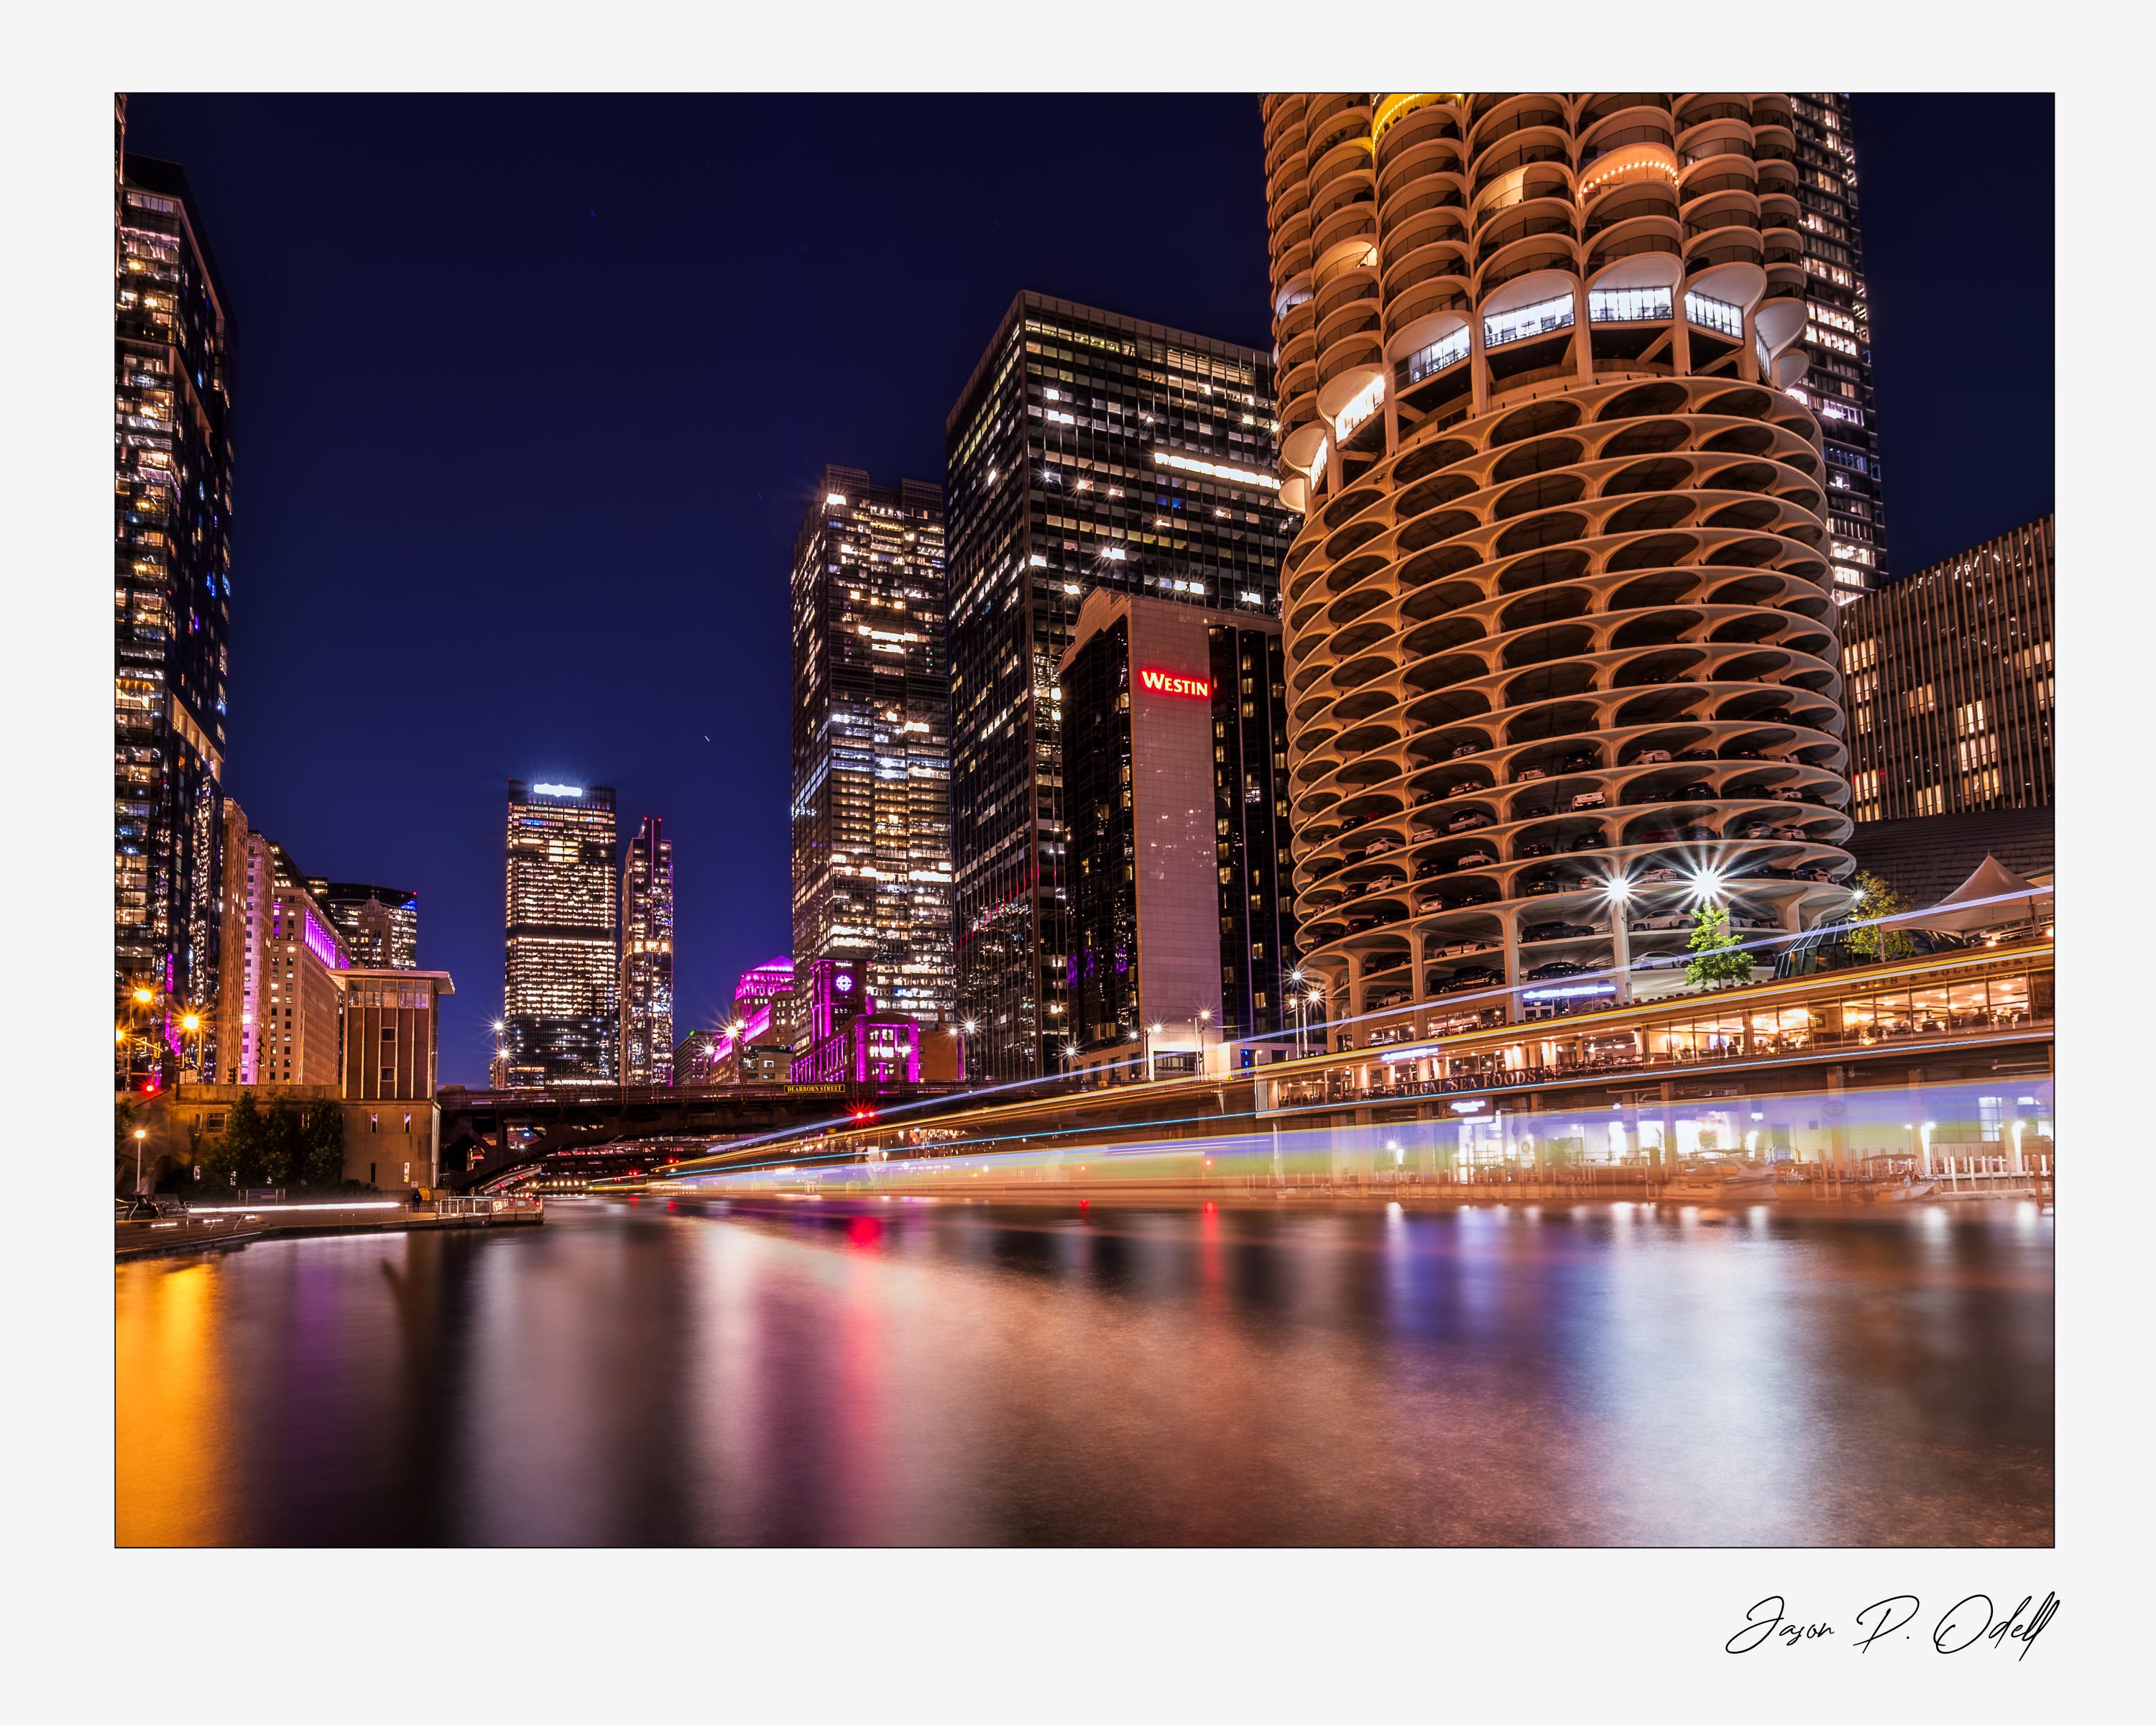
You probably know I like long exposures, and blue hour is a perfect time to get them. Usually, you don’t need much more than a polarizing filter (if anything) to extend your exposure time; just stop down and use a low ISO. We went down to lower Wacker Drive on the Chicago Riverwalk and watched the boats go past. In this shot, I set up for a 60s exposure by using the “Live ND” feature in my OM-1 Mark 2 camera. The water smooths out, and the passing boat creates a light trail through the scene with the iconic Marina City building in the background.
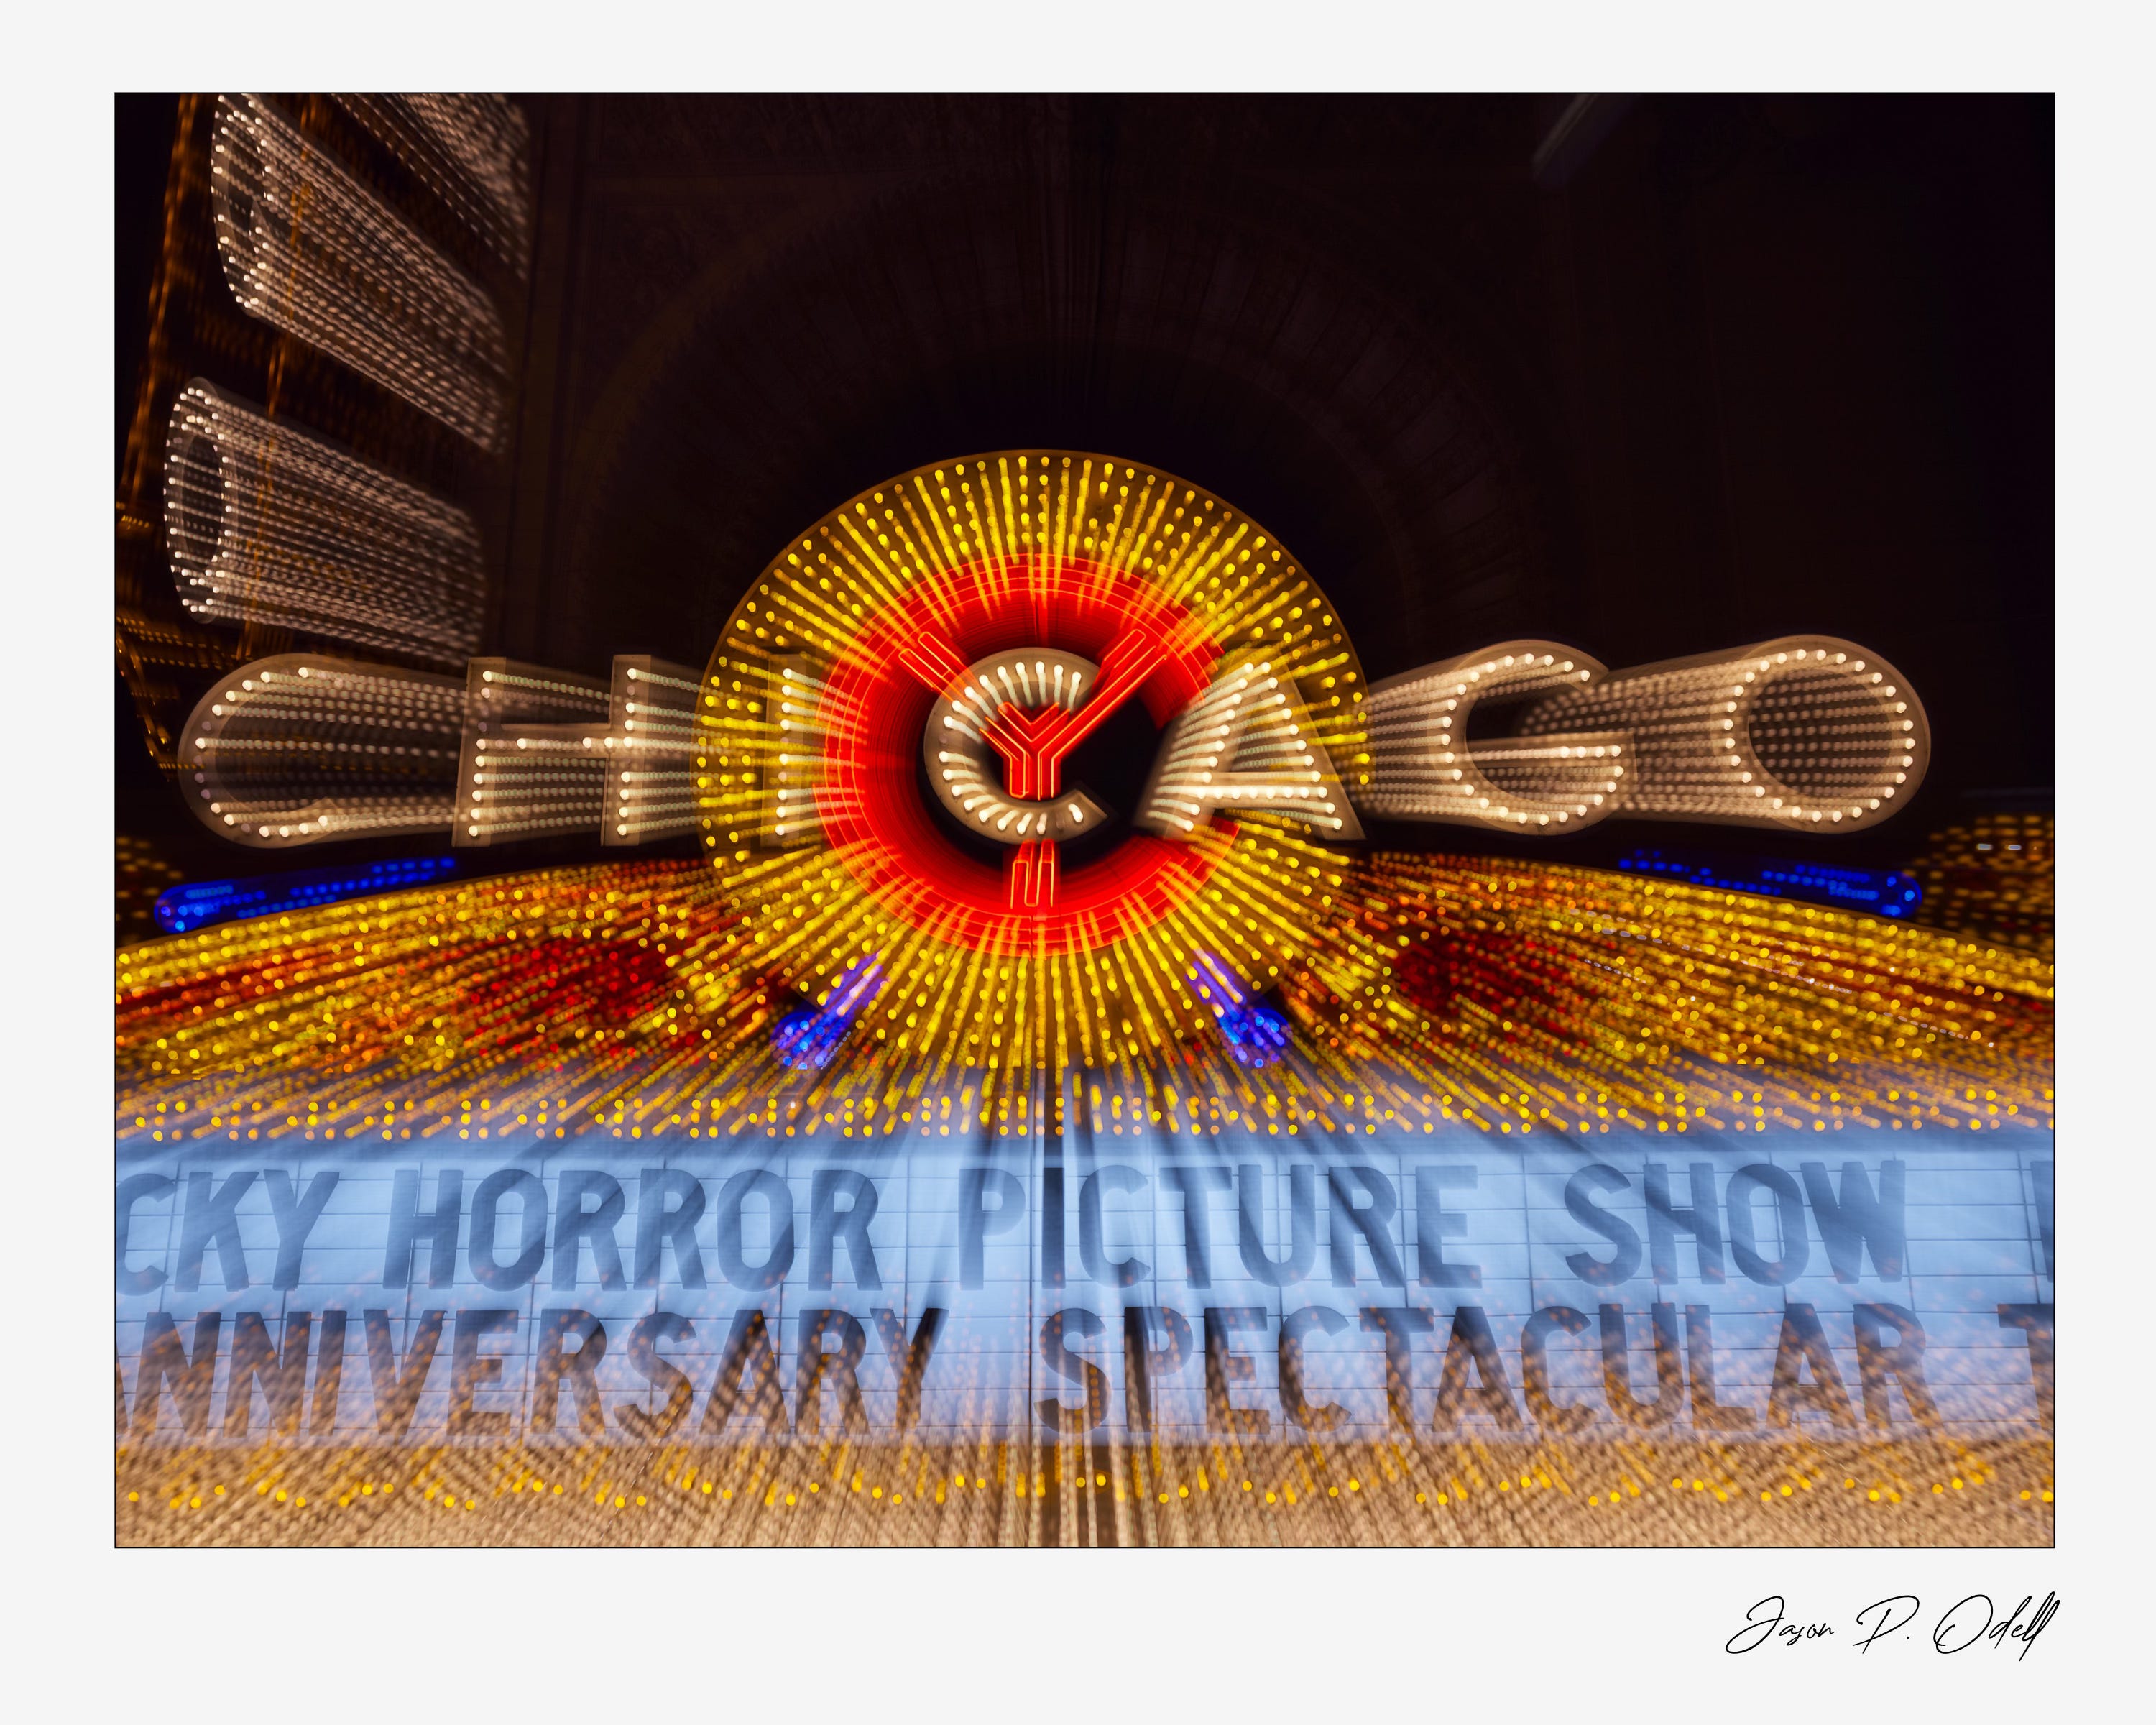
It’s important to capture photographs that establish a sense of place, and the Chicago Theater’s marquee is absolutely essential to any Chicago portfolio. We walked past it as we were returning from the Riverwalk shoot, and I went with a zoom blur (turning the zoom ring while using a long(ish) exposure. I never know how these will turn out so I repeat the process several times, zooming the lens in different directions.
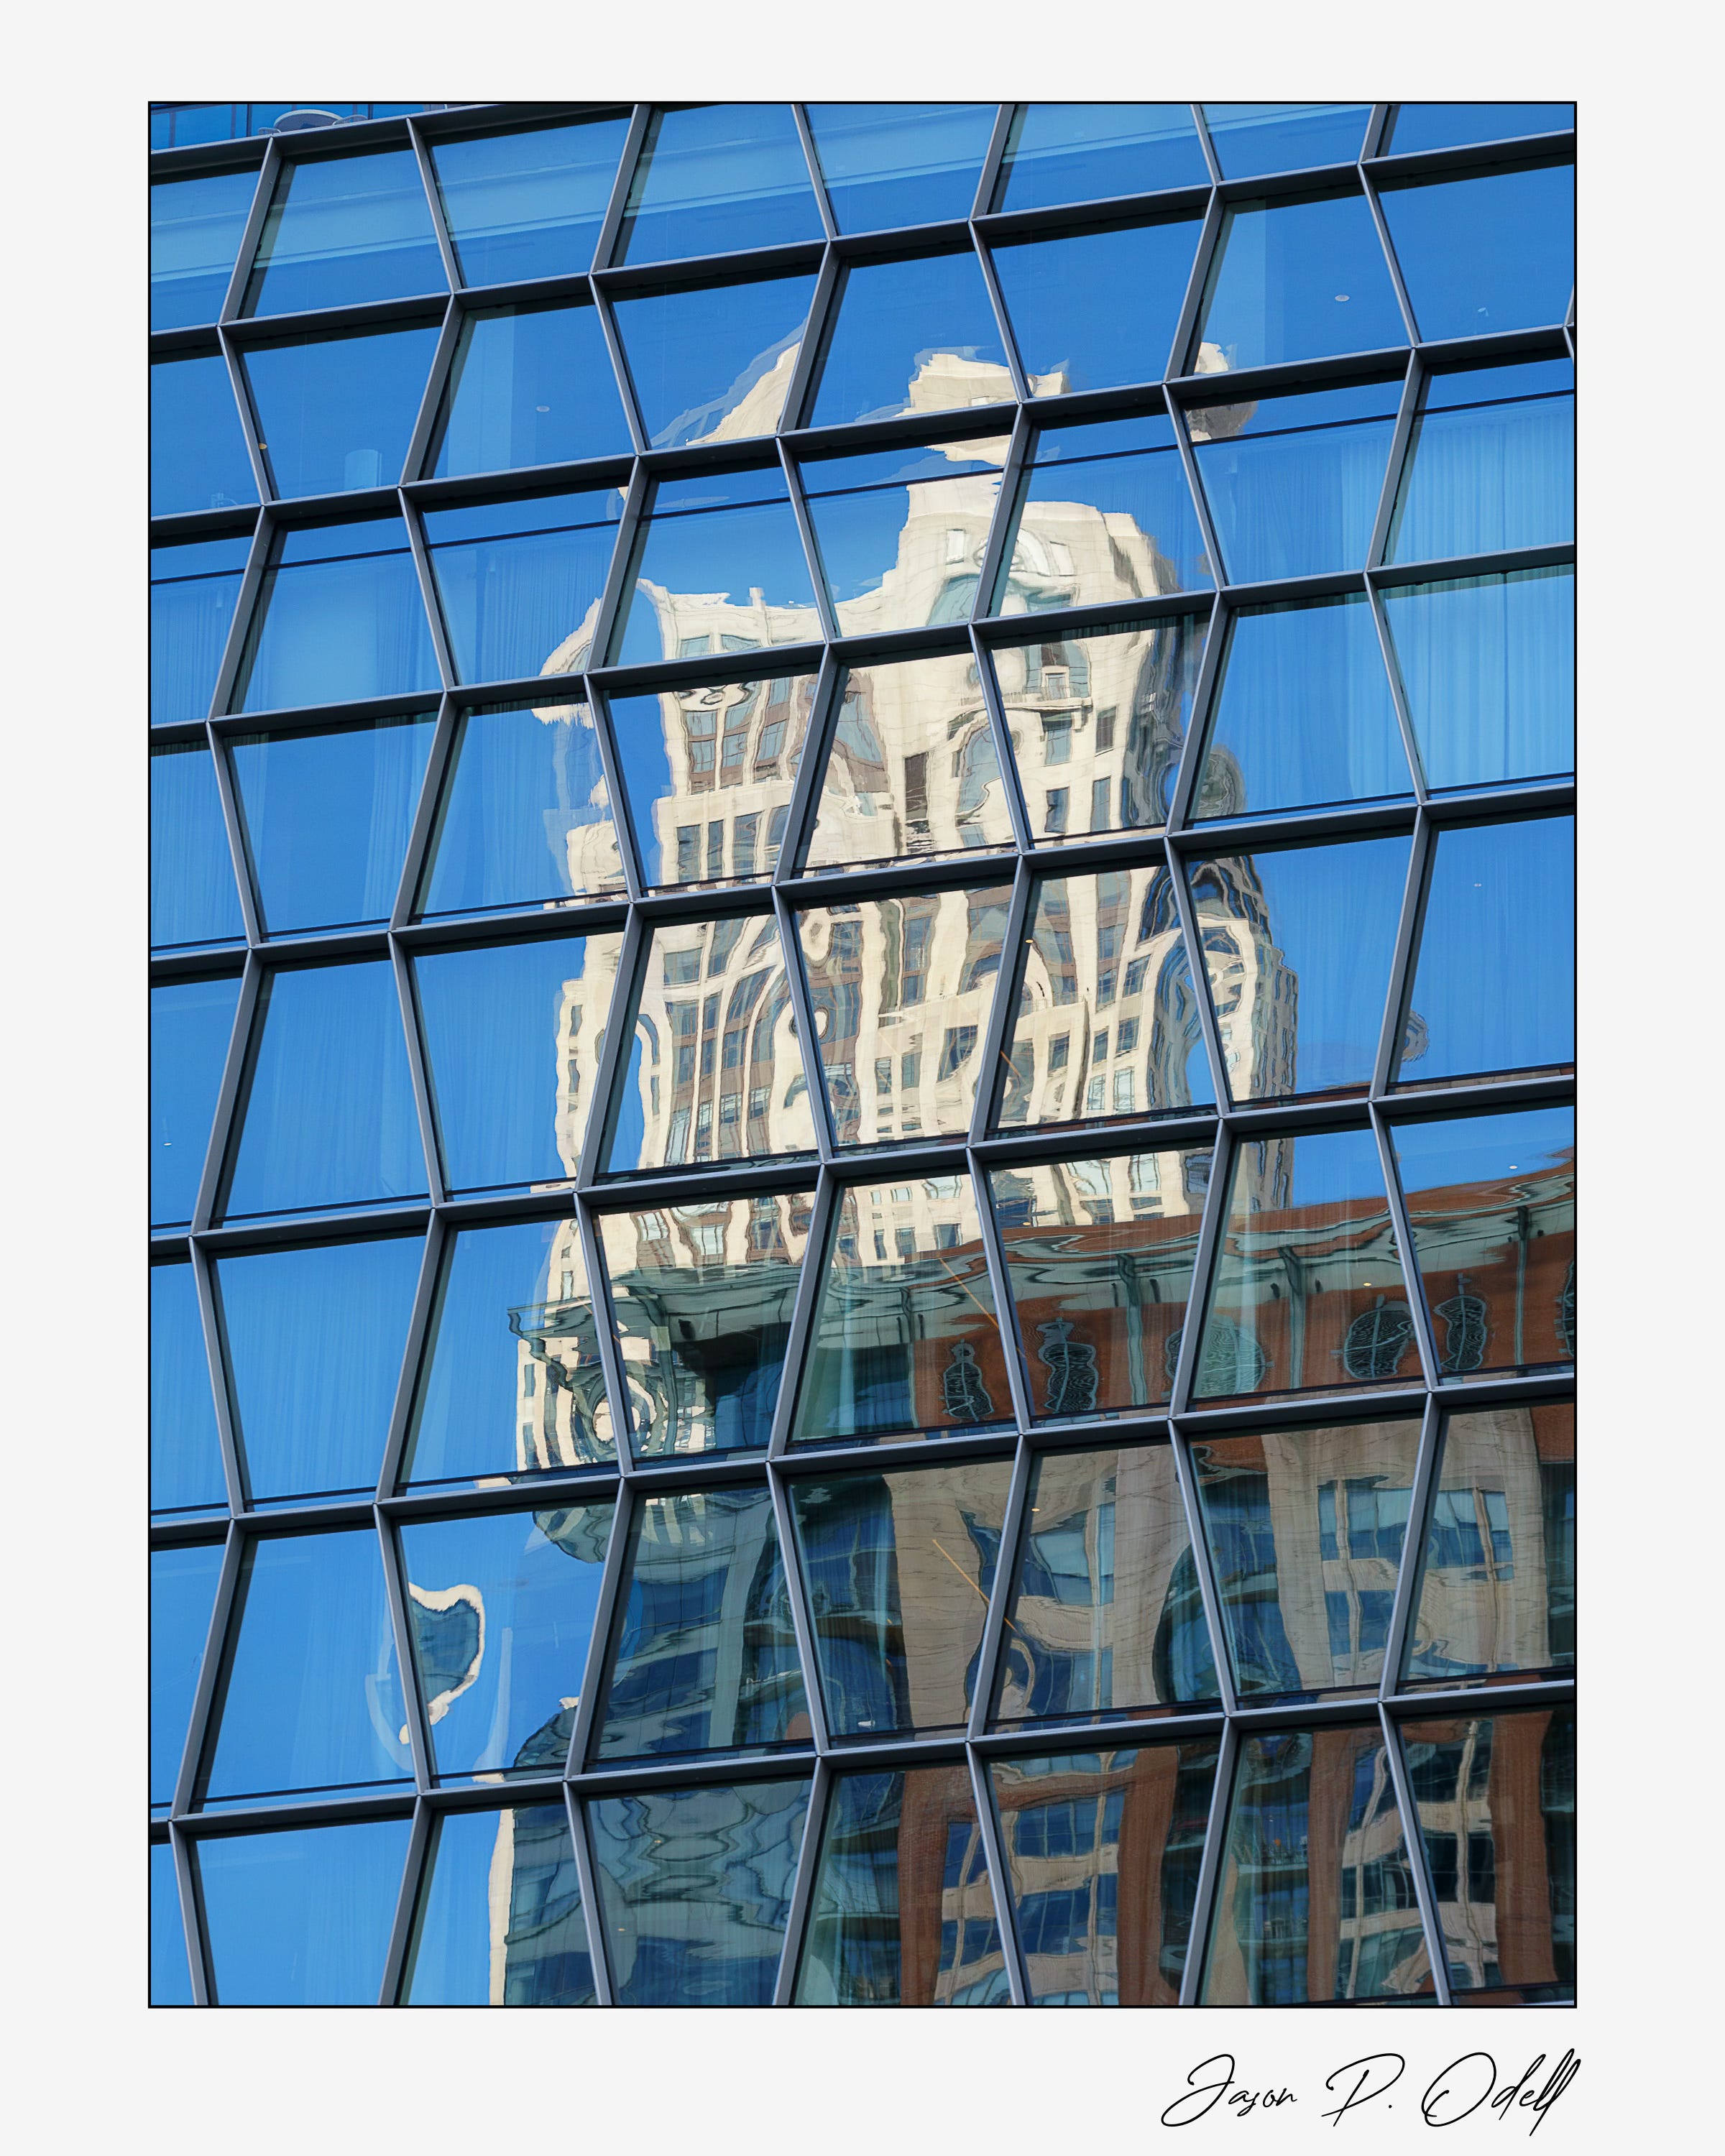
On the final day of our workshop, we went on the famous Architectural boat tour on the Chicago River. It’s a great way to see the city from a different vantage point and learn about all the various architectural styles. Wide shots are hard here, but tight shots of reflections are one of my favorite things to get:
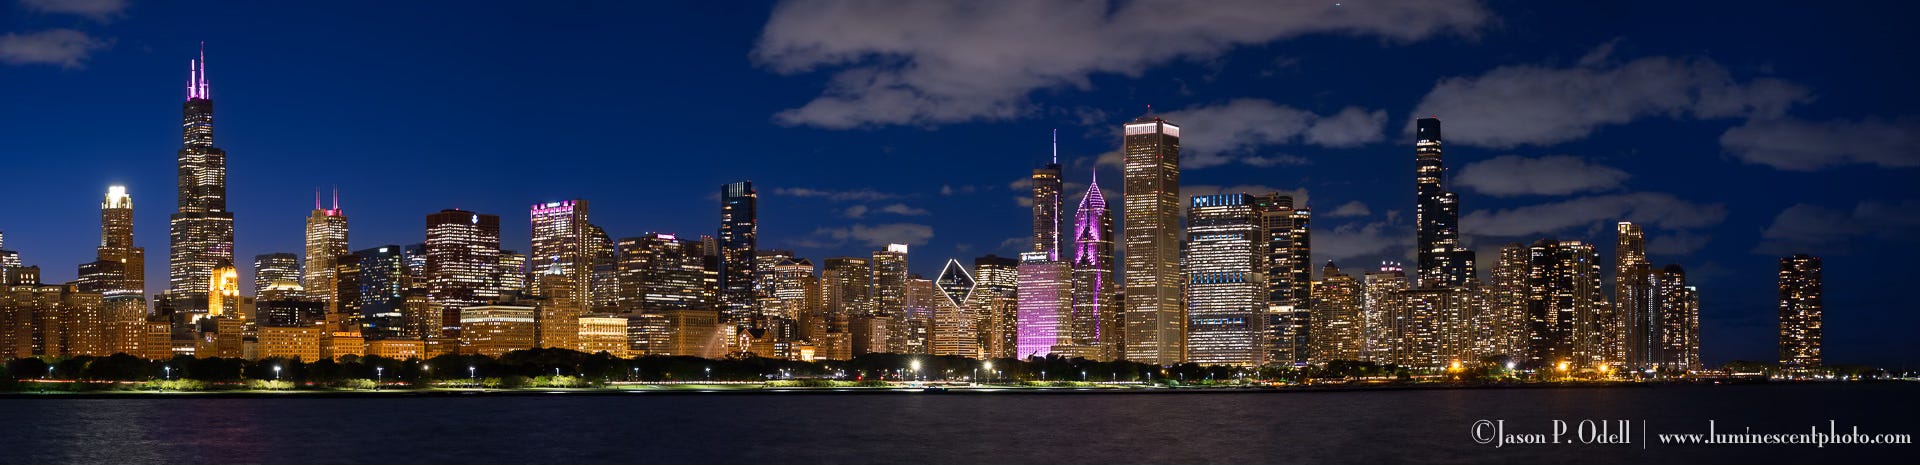
Of course, no “city” workshop would be complete without getting that classic skyline shot. Honestly, you set up for these and get what you get; there aren’t that many different compositions or subjects here. We again went out for twilight shooting and arrived at our location right at sunset. Thirty minutes later we had our blue hour, and fortunately we even had some nice clouds to enhance the scene. This shot is a 5-image stitched panorama that I merged together in Lightroom Classic. By stitching images, you not only get a higher resolution image, but you can frame the buildings more tightly and without perspective distortion. The composite photo is just over 69 megapixels (keep in mind the OM-1 is a 20.1 MP camera).
Obviously I can’t share all my photos here, so I’ve posted a web gallery of my favorites online. Thanks for looking and sharing! I also want to thank my great group of clients who helped make this event enjoyable for everyone.
Want a high-resolution printable version of these images? Contact me about digital print licenses.
Really nice set!
Looks like another great Odell workshop. Great pictures.