


While most people may recognize this Latin phrase as the motto of the United States, I was thinking about how it’s relevant in digital photography, too.
“From many, one” can apply to several photographic techniques, and if you master them, you can have a powerful set of tools in your digital “bag of tricks” as I wrote about earlier this year:
Going Beyond Your Bag

2025 marks 20 years since I started using a digital camera full-time. Prior to that, I was a strong believer in color transparency (slide) film, and that meant whatever came out of the camera was pretty much what you were stuck with. Sure, I scanned my slides, but I had nowhere near the latitude for adjusting my images when compared with digital raw capture. Over the years, I’ve made a point of teaching myself a variety of creative techniques that allow me to get more out of my photography. While some of these techniques are performed in-camera, many involve a combination of camera settings and post-processing adjustments to deliver a photograph with impact. Let’s take a look at some of my “must-learn” techniques for modern digital photographers.
Many of these techniques were borne from the limitations of earlier digital cameras, including:
Limited dynamic range
Limited resolution
Other techniques were adapted to deal with the ever-decreasing depth of field that comes with close-up photography. Let’s take a look at some examples of each of these techniques:
Increase Resolution with a Panorama Stitch
We don’t think too much about resolution as a limiting factor these days, but for a long time, most DSLRs were well under 20 megapixels. For landscape photographers seeking massive detail for making large prints, one workaround was to create a stitched panorama. This technique involves making a series of photos, each with identical exposure settings, that overlap each other partially. In post, you use software to analyze each image and find the overlapping parts, and merge them into a single frame.
In 2012, I was shooting primarily with a Nikon D4 DSLR, which had a whopping 16.2 megapixel resolution. Overall, it was a great camera, but for landscape shots printed large, more resolution was helpful. On a trip to Arches National Park near Moab, UT, I set up at sunrise to capture a beautiful scene unfolding before me. Had I used my wide-angle lens, I could have captured the entire scene in one frame, but it would have been 16 megapixels. Instead. I turned my camera vertically and set up with a 105mm lens. I proceeded to capture 6 overlapping images, using fixed exposure settings:
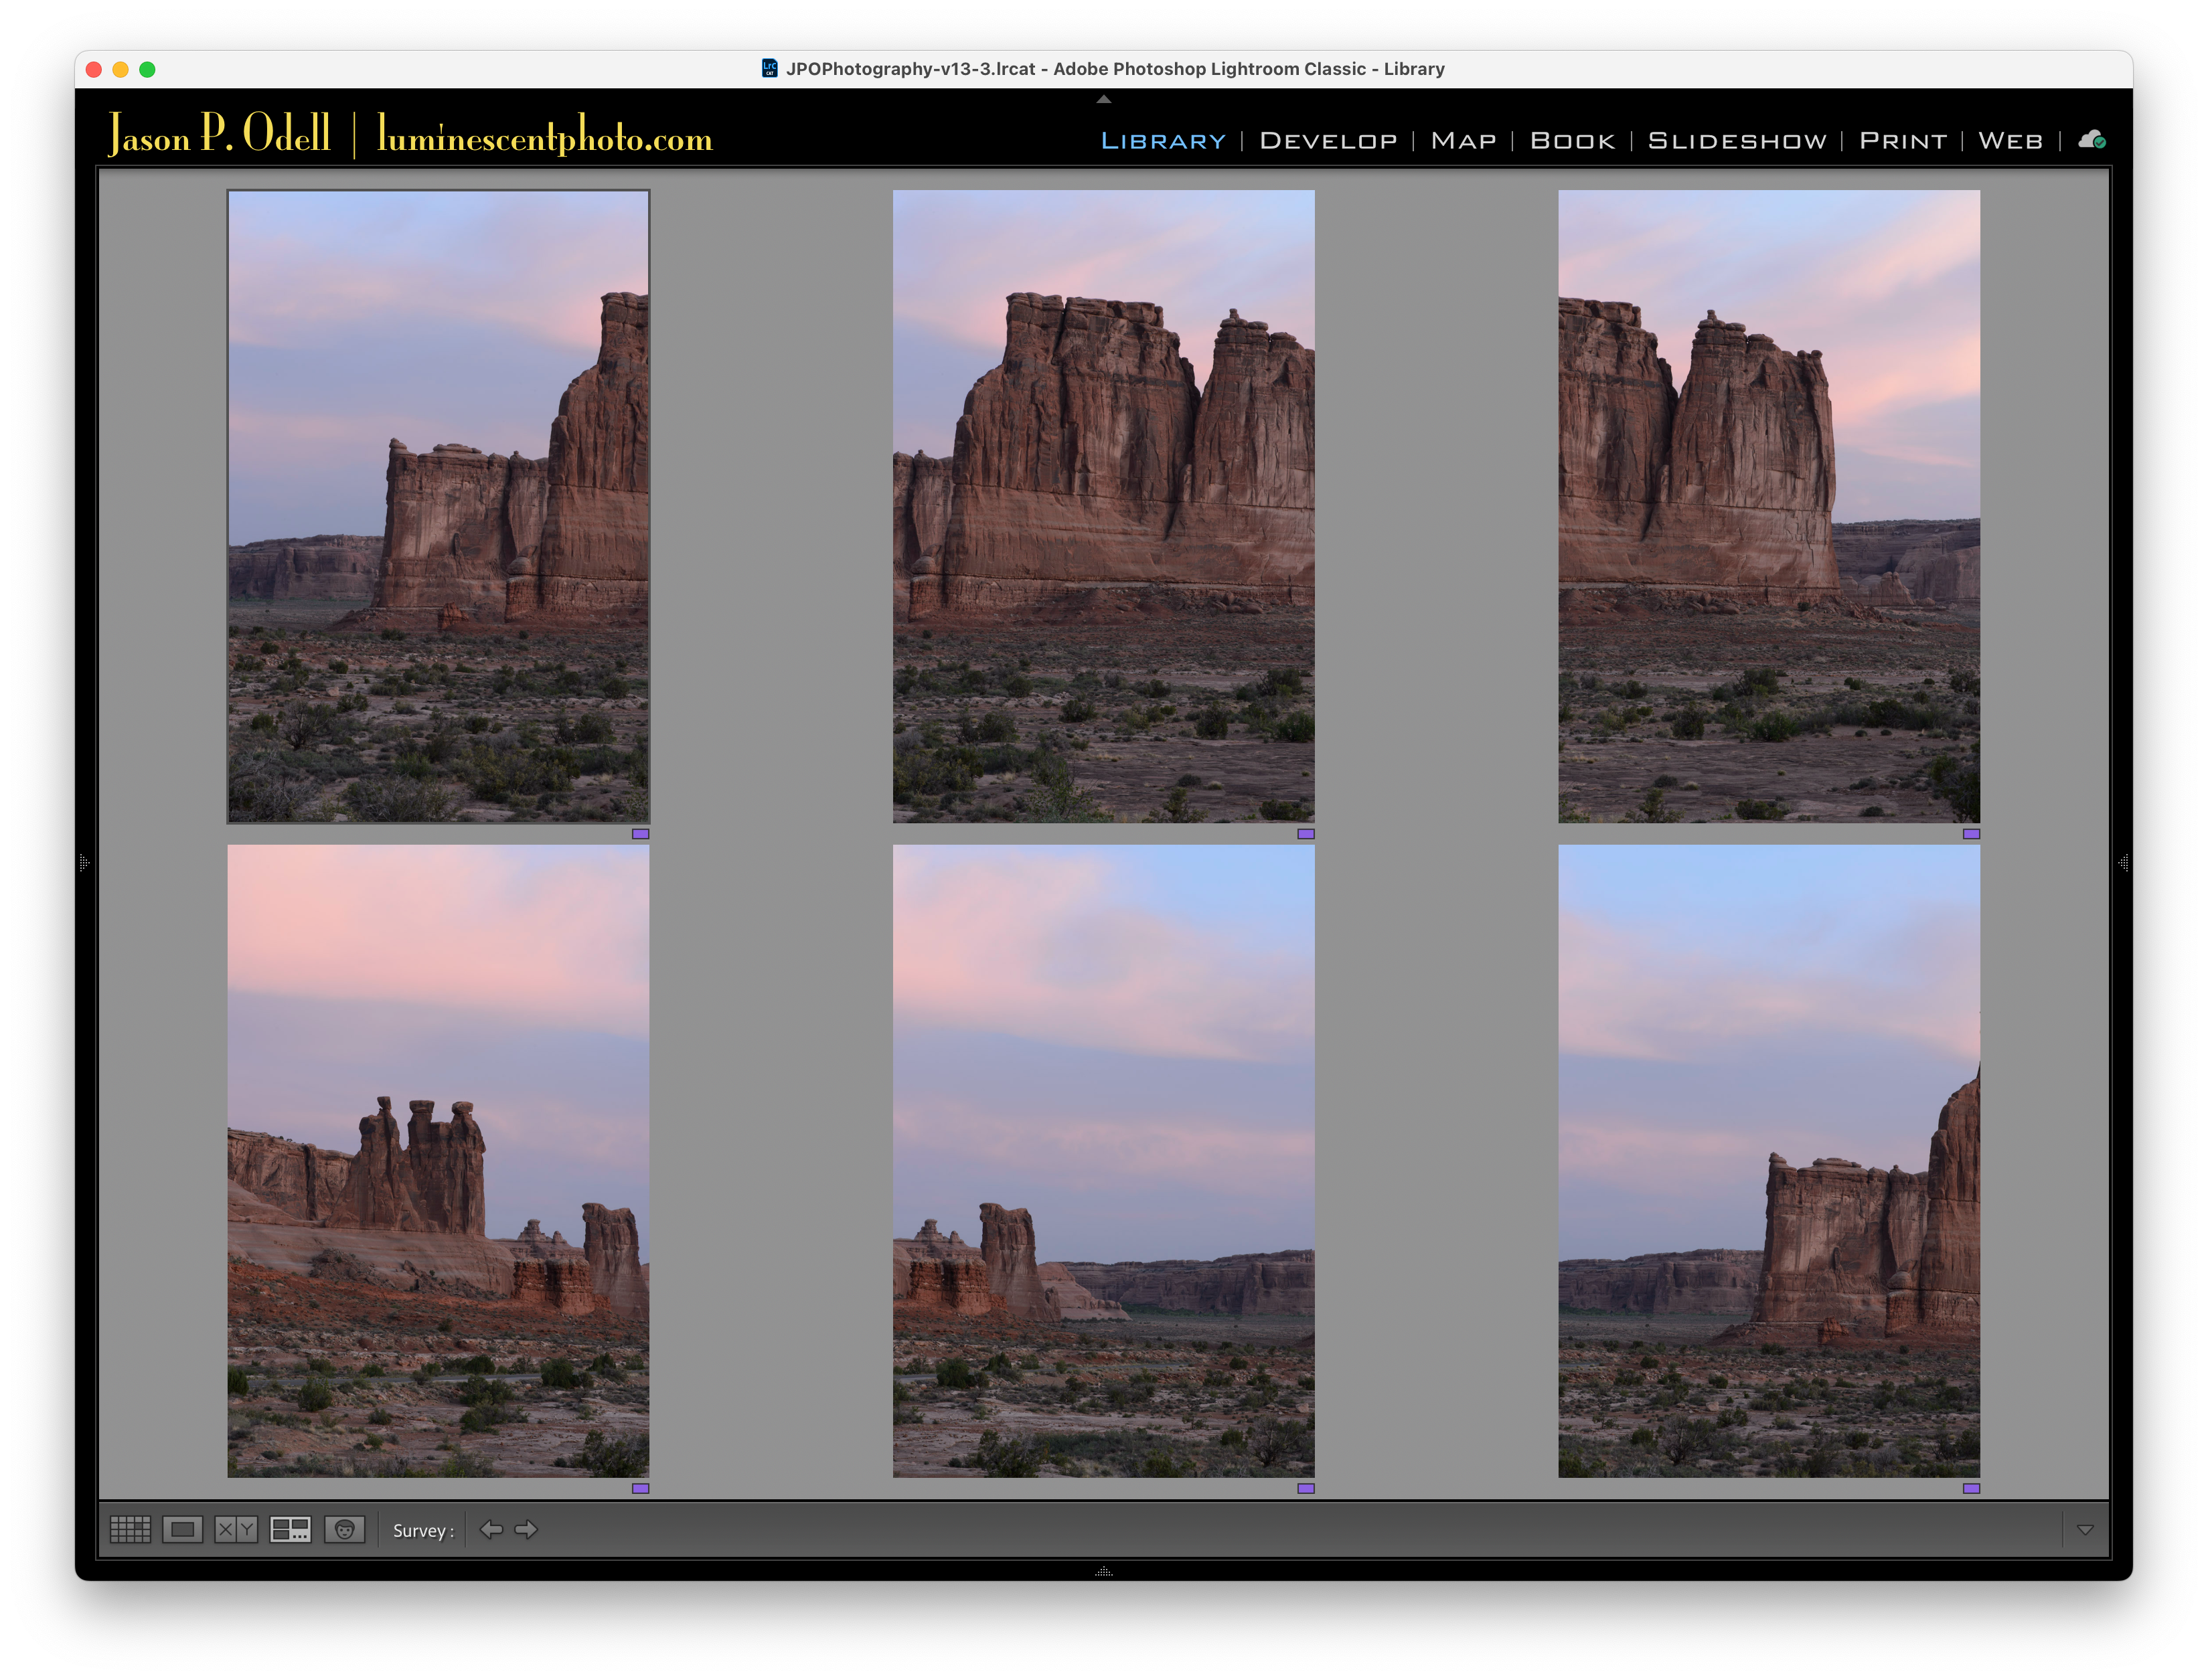
I then merged the series of images to create a 50+ megapixel panoramic photo:

Back in 2012, the stitching process required either Adobe Photoshop or other dedicated panorama stitching software. Today, you can merge the raw files directly in Lightroom and have the result saved in DNG raw format (huge benefit).
Pro Tips for Shooting Panoramas
Meter the scene and then use identical exposure settings between shots
Do not re-focus the lens between photos (set your camera to manual focus or use back-button focus)
If your camera viewfinder has gridlines, use them as reference points to ensure your frames overlap roughly 25-30%.
I strongly prefer using Lightroom Classic to stitch panos. The resulting file is saved in DNG format and preserves the underlying raw data from your photos. This makes post-processing far easier than working with TIFFs or PSD format files.
Most modern stitching software, including Lightroom, can even stitch multi-row panoramas!
Increase Dynamic Range with HDR
The early DSLR cameras not only lacked resolution, but also dynamic range. My old Nikon D2x maxed out at just under 8 EV of dynamic range at its base ISO setting. Many scenes, especially back-lit landscapes or sunrises/sunsets would easily exceed the dynamic range of the camera sensor. The result was an exposure compromise similar to how we treated slide film; Capture the highlights and clip the shadows or expose for the shadows and risk blowing out the highlights. In digital photography, blown highlights are generally unrecoverable, so we’d pull up the shadows in post (and find all kinds of noise hiding in there).
Prior to digital, the typical solution for these scenes was to use a graduated neutral density (ND grad) filter. These filters were great for outdoor scenes with clean horizons, but not so great for scenes with dominant foreground objects or indoor shots. The answer again was to merge two or more images together in post to create a final image that contained more tones than any one image alone. This process became known as HDR (high dynamic range) photography.
The proliferation of HDR as a technique in the mid to late 2000s became almost farcical. The software at the time wasn’t as nuanced as it is now and could easily produce really ugly weird images (and yet some people fawned over them anyway). Today, the use of HDR isn’t as widespread as modern cameras can easily deliver 10-14 EV of dynamic range. But the technique still comes in handy in tricky situations.
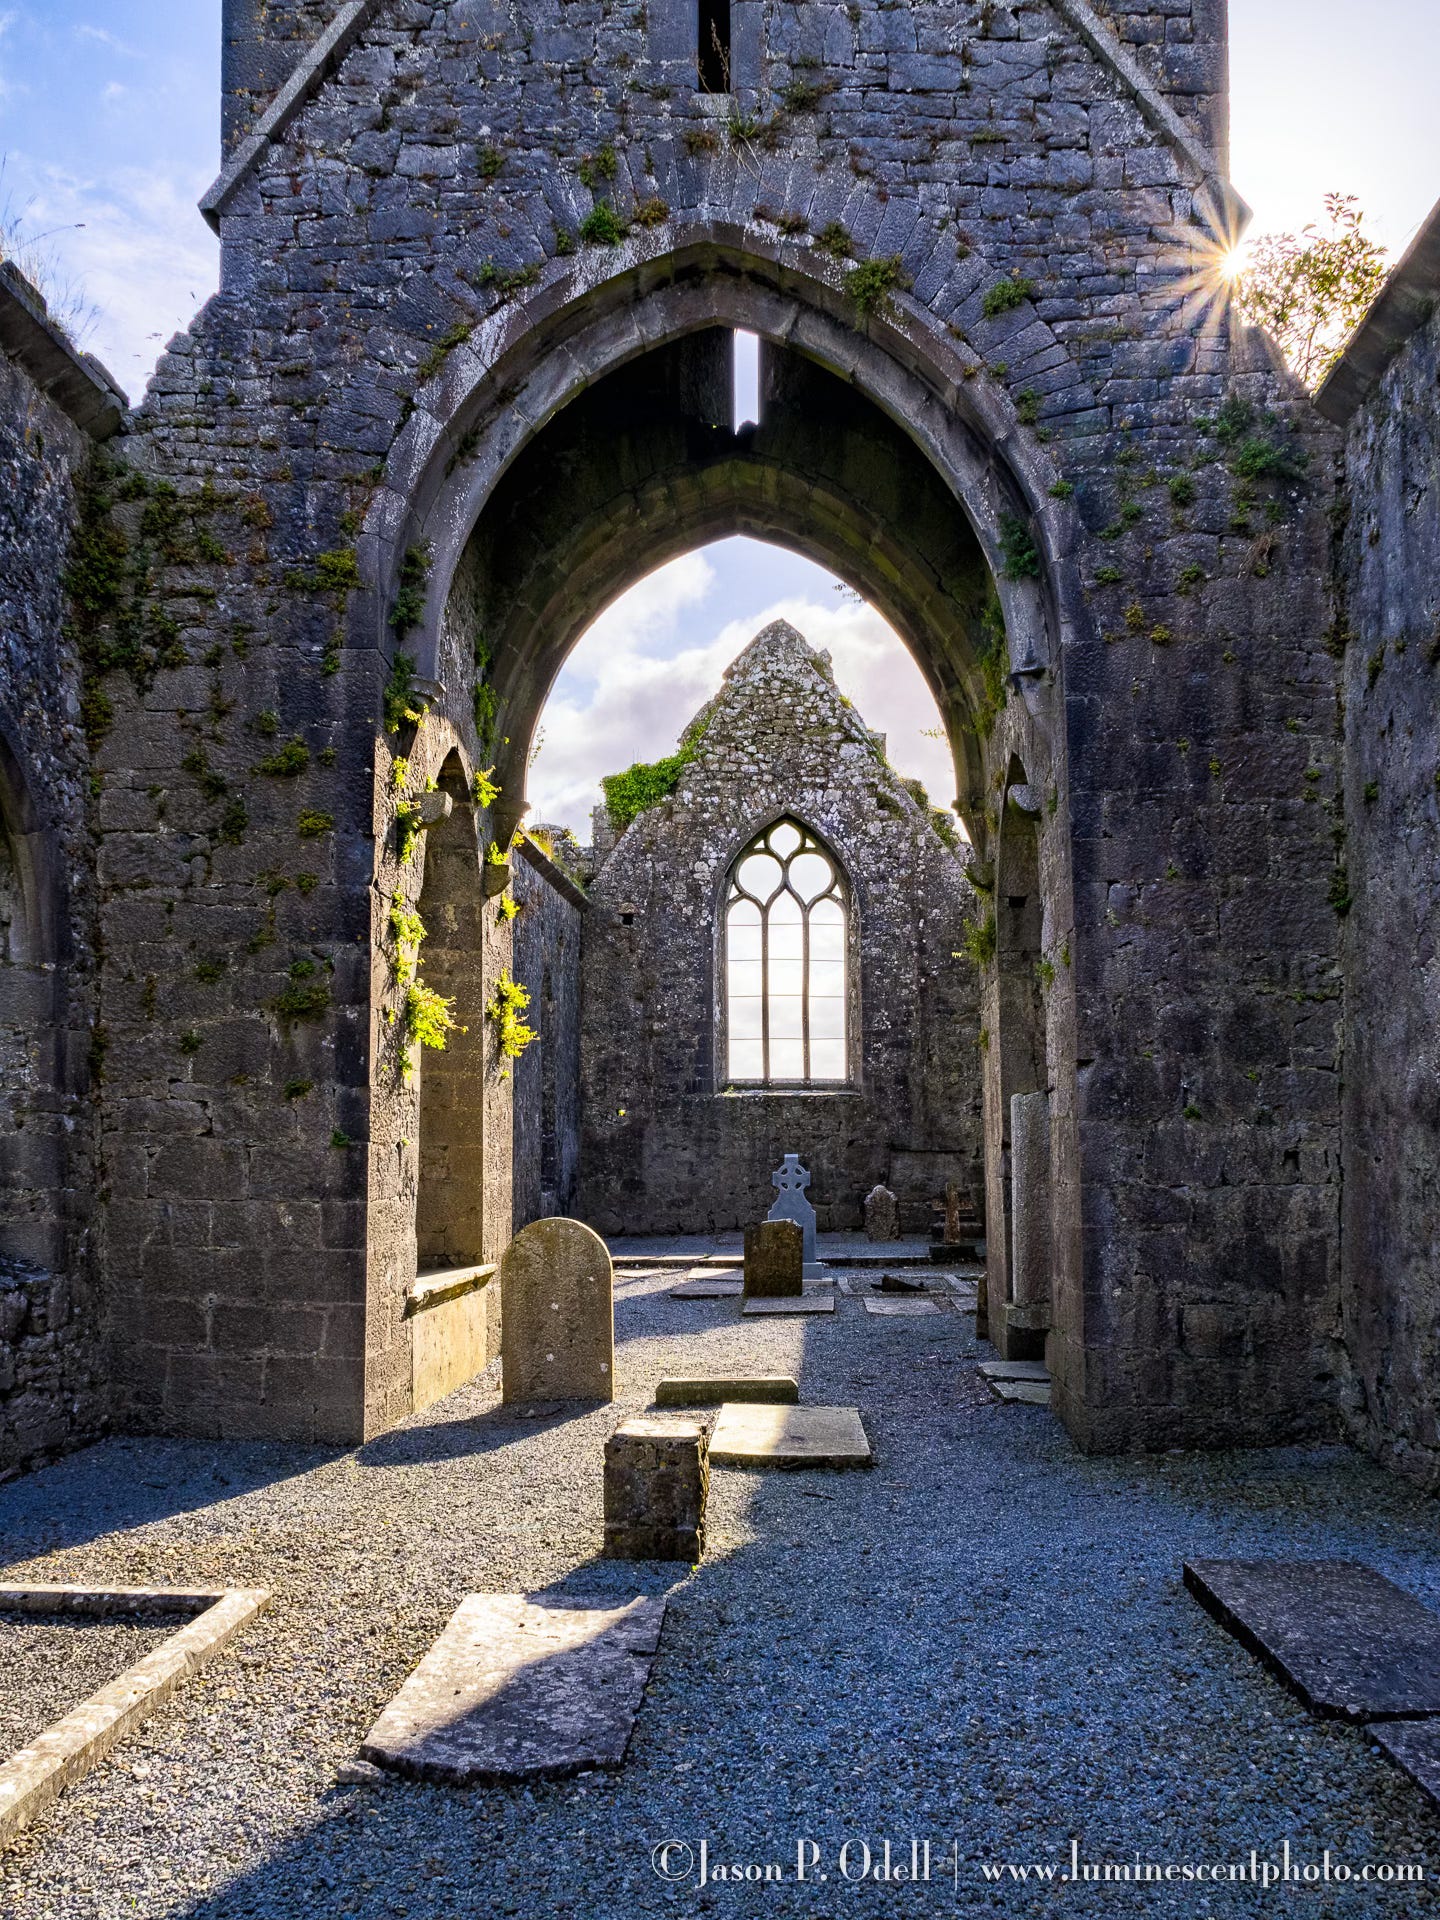
In the fall of 2024, I was with clients in Ireland. We had a morning stop at the ruins of an old abbey, and the sun was starting to peek out over the stone walls of the ancient church. Shooting directly into the sun is never an easy exposure; you can choose to expose for the sky or the shadows, but not both. I set my camera (OM-1 Mark 2) to auto bracket three consecutive shots, each with a different exposure setting:

I then merged the three photos using HDR Merge in Lightroom Classic to produce a new DNG raw file that contained all the tones from each of the original captures. That file is the one I processed and resulted in the final photo. Trained photographers will quickly notice that the exposure settings for shooting such a backlit subject could not be produced in a single frame (unless you’re using a medium-format camera), but the final product is pretty natural-looking.
Pro Tips for HDR Capture
Most scenes only require three shots, spaced 2EV apart (-2/0/+2EV)
Use aperture-priority exposure mode so that only the shutter speed changes between shots
Use a fixed ISO whenever possible
Do not change the focus between shots
Use continuous high-speed advance if possible, and use a tripod if needed to prevent framing shifts
HDR Merge in Adobe Lightroom/Classic allows the merging of raw images into a new raw file (DNG format), making natural post-processing extremely easy.
When processing your HDR images, don’t forget to keep shadows dark and highlights light. Otherwise everything becomes a mid-tone and looks unnatural.
Extending Depth of Field with Focus Stacking
The last technique I want to discuss today has nothing to do with the limitations of digital cameras but instead the limitations of lens optics. Depth of field is a term used to describe an object appearing in-focus in front of or behind the actual focus plane. Depth of field is influenced by many factors, including:
Lens focal length
Aperture (ƒ-stop)
Subject distance
Sensor format (size)
Print size
In general, as you get closer to your subject, depth of field drops off dramatically. Stopping down the lens aperture helps, but then you also run into issues with slower shutter speeds and the appearance of out of focus backgrounds (bokeh). Stopping down also increases the risk of diffraction softening in your photos. Film photographers shooting landscapes who wanted maximum depth of field often combined a small aperture (f/22 or more) with a bellows-mounted lens that they could tilt to shift the focal plane to encompass foreground and background. Today, that’s not something most of us have at our disposal. Enter a new technique made possible with digital images.
Years ago, some serious macro photography enthusiasts came up with the idea of “focus-stacking.” With this technique, you capture a series of images with the point of focus shifting very slightly between each one, from foreground to background. Those images are then merged using specialized software that detects the sharpest edges in each frame and masks (hides) the out of focus areas. The end result is a photo with far more depth of field than any single shot could capture, even if you aren’t stopped way down.
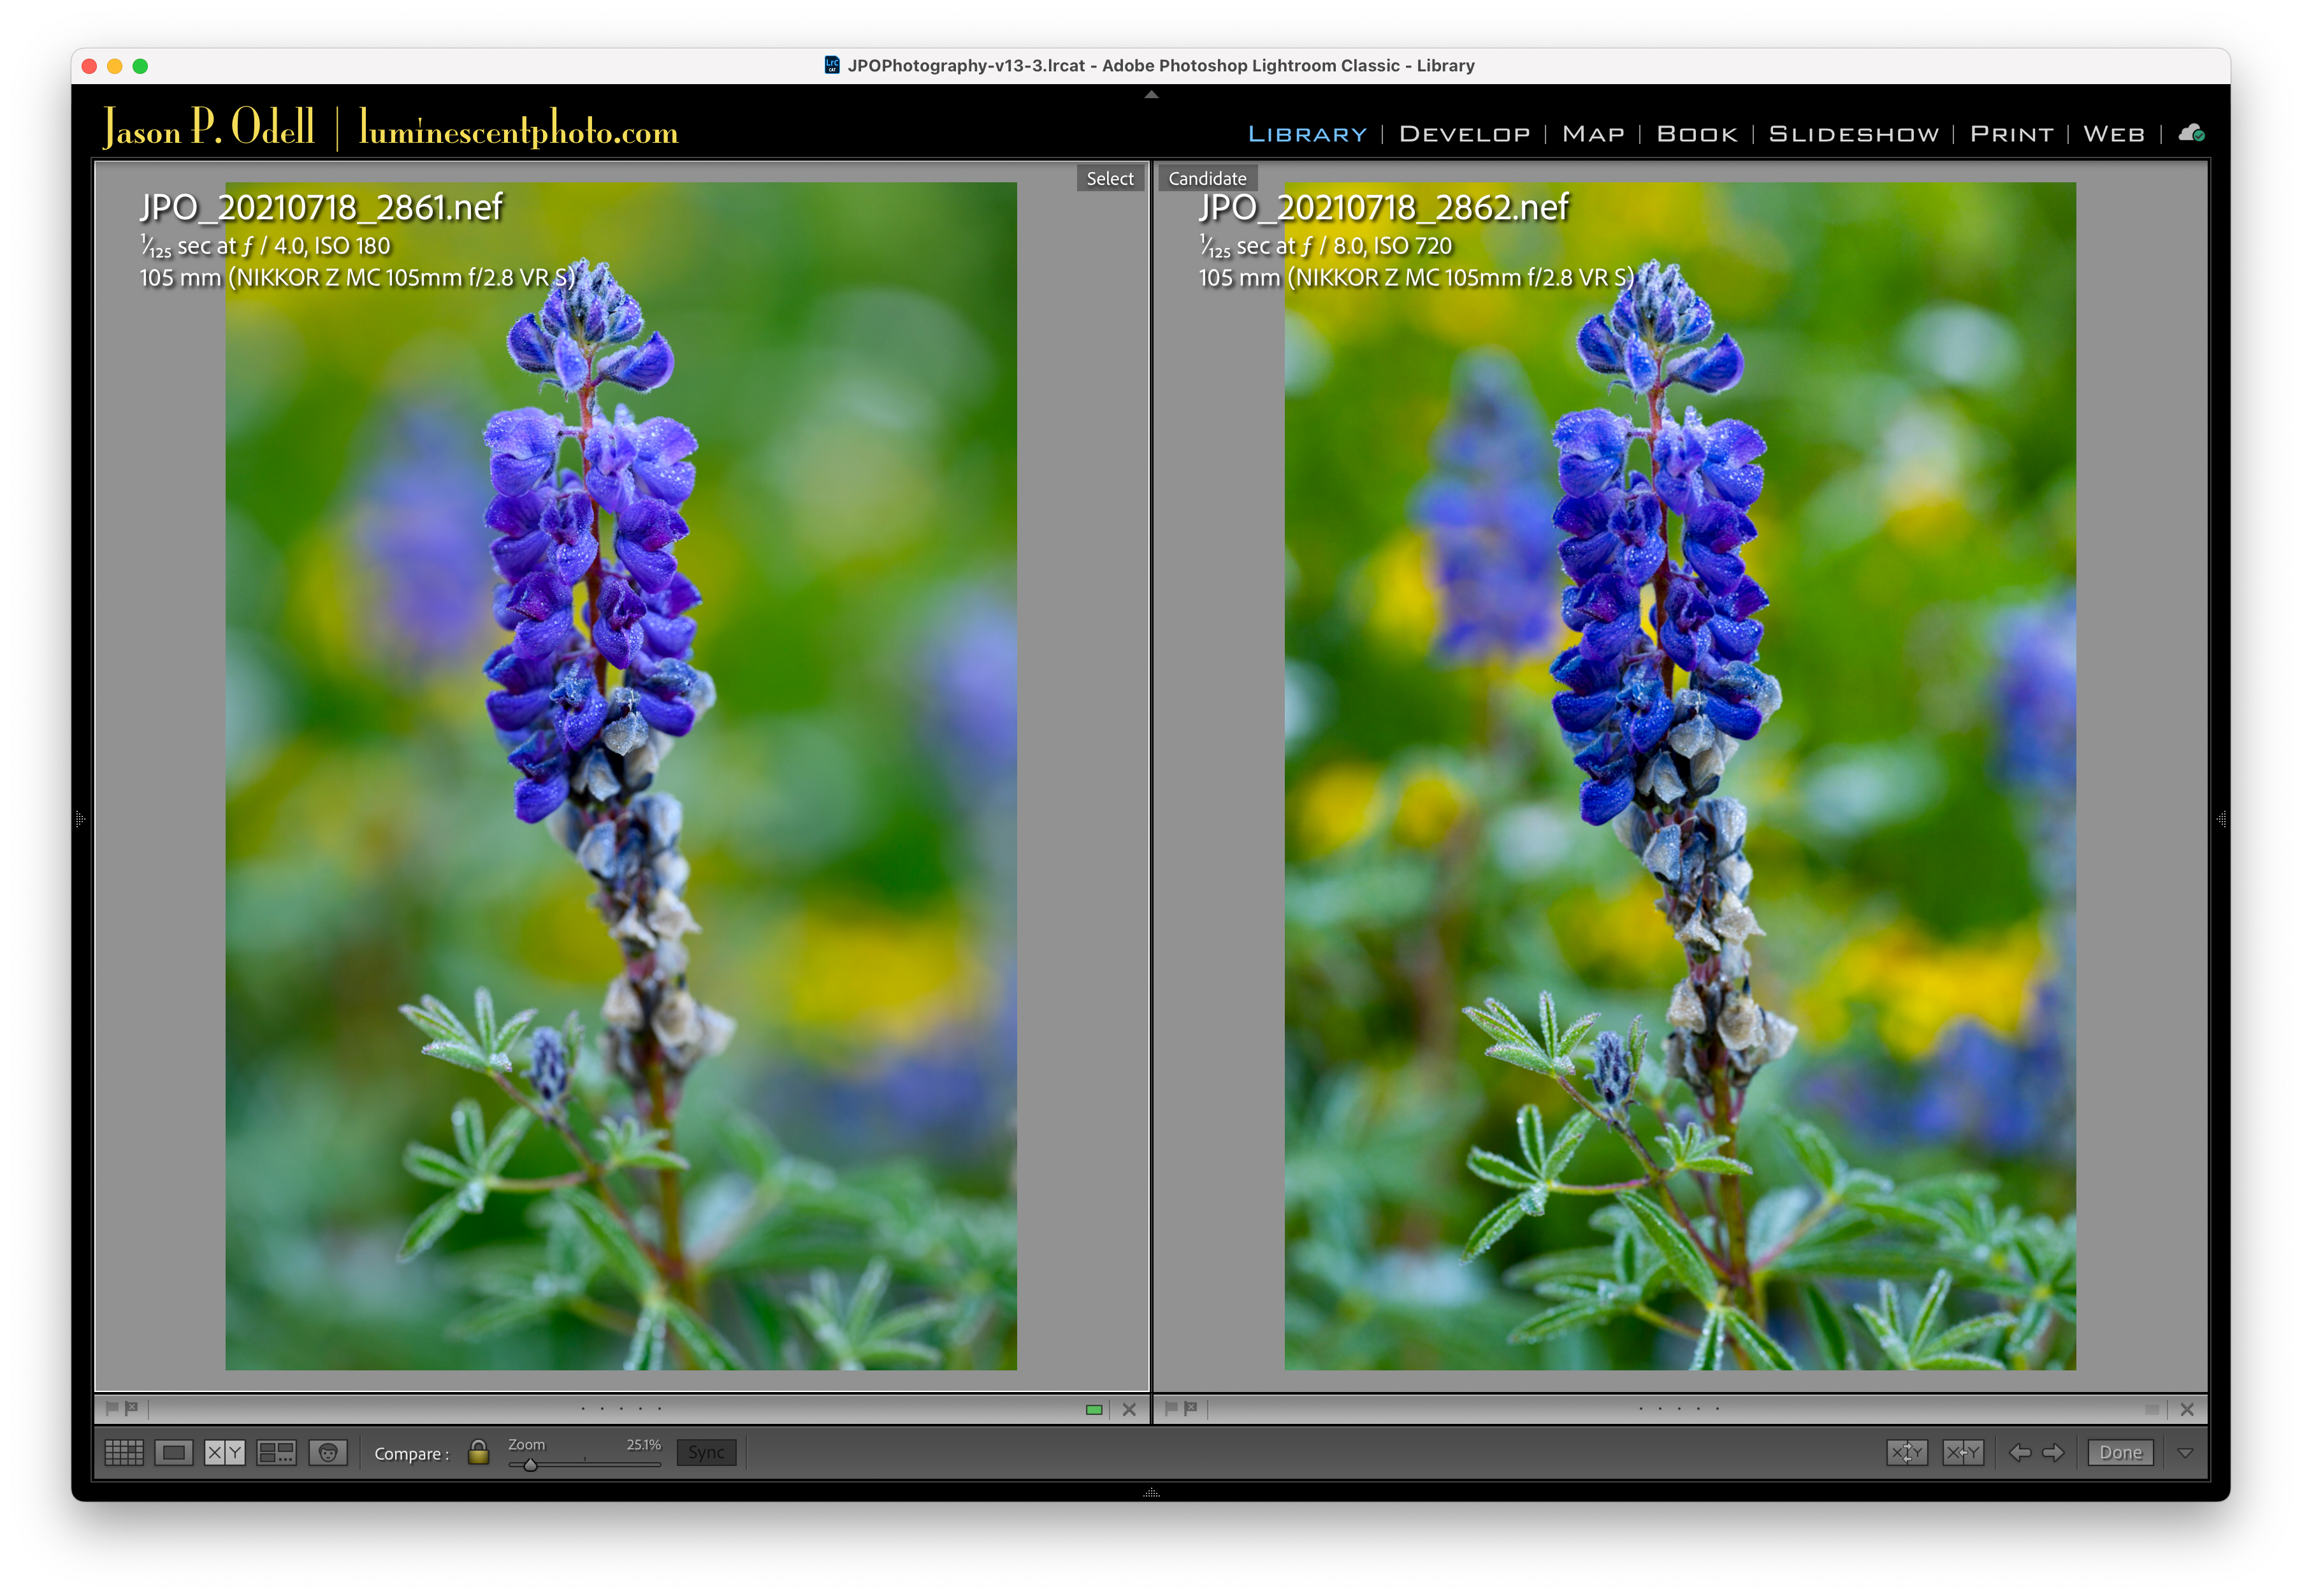
The benefits of focus stacking go beyond just super close-up photography. By capturing a sequence of stacked photos, you don’t need to stop down to f/32 to maximize depth of field. You can shoot right at the lens’ “sweet spot” (usually ƒ/5.6-ƒ/8) and eliminate the risk of diffraction softening. Moreover, in environmental close-ups, keeping the aperture relatively wide allows you to get nice soft backgrounds. You can use focus stacking for both macro/close-up photos and also landscapes. If you have Adobe Photoshop, focus stacking is something you can do natively; here’s my free PDF guide to the process for basic landscape work.
Pro Tips for Focus Stacking
Use a tripod and manual exposure so that nothing changes between shots except the point of focus
For landscapes with wide lenses, you can manually focus three shots: foreground, middle-ground, and background
Some cameras have automated focus-stacking settings. It’s often called different names, like focus-shift shooting (Nikon) or focus-bracketing (OM System). A good rule of thumb for non-macro subjects is to set the step increment to 4 and capture 4-10 shots (it seems most cameras use very similar algorithms.
When shooting an automated focus series, always focus on the nearest object first and then let the camera handle the rest of the sequence automatically.
For even more options when merging focus stacks, consider dedicated software such as Helicon Focus.
Pitfalls with Multi-Shot Images
Each of the techniques I discussed today are incredibly good when implemented properly. Not only can they give you better-quality photos, but they can be a creative technique all by themselves. The big issue with multi-shot tools is that you cannot capture all the images in your sequence simultaneously. Each frame is offset in time. As long as nothing is moving in your images and you use a tripod, this is often not an issue. However, camera movement and (more importantly) subject movement between shots is problematic. If objects in your scene move between shots, you’ll end up with what’s called “ghosting artifacts.” Many HDR software programs have tools to help with this issue, but it’s never ideal. Nevertheless, I think each of the methods I discussed today are useful and when applied correctly offer photographers more creative freedom than single shots alone.
Just remember: E pluribus unum
